
Installing the Plug-in for Workspace Desktop Edition
The Genesys Web Engagement Plug-in for Workspace Desktop Edition allows you to enable chat and web callback engagement features in Workspace Desktop Edition. See Genesys Web Engagement Plug-in for Workspace Desktop Edition Help for details.
To install this plug-in, complete the following procedures:
- Installing the Plug-in for Workspace Desktop Edition
- Importing the Plug-in for Workspace Desktop Edition Template
- Adding a Connection to the Web Engagement Cluster.
- Adding a Connection to the Web Engagement Cluster using a load balancer option (an alternative approach to Adding a Connection to the Web Engagement Cluster).
- Genesys Web Engagement can also work with agents who are Team Leads. For details about how to configure Team Leads, see the following topics in the Workspace Desktop Edition Deployment Guide:
Installing the Plug-in for Workspace Desktop Edition
Prerequisites
- Your environment includes Workspace Desktop Edition. See Genesys environment prerequisites for compliant versions. For more information about installing Workspace Desktop Edition, refer to the Workspace Desktop Edition Deployment Guide.
Start
- In your installation package, locate and double-click the setup.exe file.
- Click Next. The Select Installed Application screen appears.
- Select your Workspace Desktop Edition application.
- Click Next. The Ready to Install screen appears.
- Click Install. The Genesys Installation Wizard indicates it is performing the requested operation for the Genesys Web Engagement Plug-in for Workspace Desktop Edition. When through, the Installation Complete screen appears.
- Click Finish to complete your installation. As a result of the installation, the following files are copied to the Workspace Desktop Edition installation directory:
- Genesyslab.Desktop.Modules.WebEngagement.dll
- Genesyslab.Desktop.Modules.WebEngagement.module-config
- Genesyslab.Desktop.Modules.WebEngagement.deployment-config
- Newtonsoft.Json.Net35.dll
End
Importing the Plug-in for Workspace Desktop Edition Template
Prerequisites
- You completed Installing the Plug-in for Workspace Desktop Edition
Start
- In Genesys Administrator, navigate to Provisioning > Environment > Application Templates.
- In the Tasks panel, click 'Upload Template.
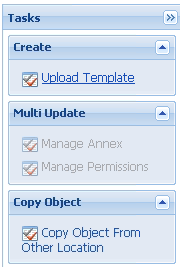 Upload Template link in the Tasks panel
 - In the Click 'Add' and choose application template (APD) file to import window, click Add.
- Browse to the GWE_WDE_Plug-in.apd file located in the Templates folder in your installation package. The Configuration tab for the new template opens.
- Click Import Metadata.
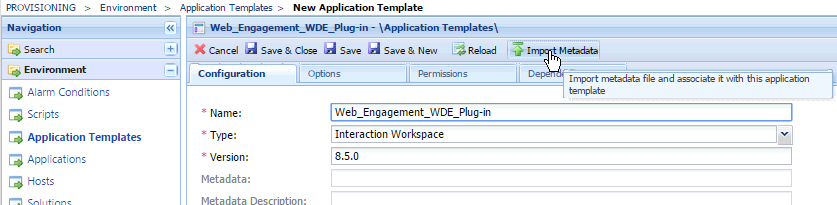 Click Import Metadata.
 - Select the GWE_WDE_Plug-in.xml metadata file and click Open. The metadata fields in the Configuration tab are now filled.
- Click Save & Close.


End
Adding a Connection to the Web Engagement Cluster
Prerequisites
Start
- In Genesys Administrator, navigate to Provisioning > Environment > Applications, select the Workspace Desktop Edition application, and click Edit....
- In the Connections section, click Add. The Browse Applications window opens.
- Select the Web Engagement Cluster application and click OK. The cluster is added to the list of Connections.
- Click Save & Close.
End
Adding a Connection to the Web Engagement Cluster using a load balancer option
(This is an alternative approach to Adding a Connection to the Web Engagement Cluster.)
Prerequisites
- You completed Importing the Plug-in for Workspace Desktop Edition Template
- Your Workspace Desktop Edition application already has a connection to an application cluster other than the Web Engagement Cluster.
Start
- In Genesys Administrator, navigate to Provisioning > Environment > Applications, select the Workspace Desktop Edition application, and click Edit....
- Select the Options tab and click New.
- Set the following values:
- Location: Options
- Section: settings
- Name: loadbalancer
- Value: The address of your load balancer for the Web Engagement Cluster — for example, http://198.51.100.12:8000.
- Click OK. The option is added to the [settings] section.
- Click Save & Close.
End
Configuring Role-Based Access Control
Complete this procedure to allow specific users or groups to manage Web Engagement in Workspace Desktop Edition.
Prerequisites
Start
- In Genesys Administrator, navigate to Provisioning > Accounts > Roles.
- Edit or create a Role responsible for managing Web Engagement in Workspace Desktop Edition. For instance, create the Agent can Monitor Web Engagement role by clicking the New button.
- Select the Role Privileges tab.
- In the Add/Remove Products top panel, enable Workspace Desktop Edition and expand the Workspace Desktop Edition Web Engagement Privileges section.
- Set the Allowed value for the Agent - Can Monitor Web Activity option.
 Select Allowed
 - In the Members section of the Configuration tab, add the users or groups who should get this role.
- Click Save & close.

End
Next Steps
This page was last edited on May 31, 2019, at 20:18.
Comments or questions about this documentation? Contact us for support!