
When downloading content, you may encounter issues that are easily resolved. If these tips don't help, please Contact Us, and we will try to send you the file directly.
Downloading Help files
Save the Help file to your local hard drive, and uncompress (extract) it to an empty folder. To open the Help file, open the folder into which the .zip file was extracted, then do one of the following:
- If there is only one file in the folder, click that file.
- If there is more than one file in the folder, click the <name of compressed file>.htm file.
Viewing Help files
If, when you open the Help file, the contents do not display in the right window, consider the following:
- Are you trying to open the file on a remote computer? If so, copy it to your local machine. Due to a Microsoft security update, you cannot properly view a HTML-based (CHM) Help if it is located on another machine on your network.
- What is your permissions setting? Right-click the file, select Properties from the context menu, look for an Unblock button, and click it.
Pacing
About Pacing
Many products allow you to focus on reactive engagement sessions, in which a customer initiates the connection with your contact center by responding to a static request, such as a Chat Now button. Genesys Web Engagement goes a step further, by predicting when it's a good time for your contact center to take the initiative—to reach out to a customer proactively. For example, Genesys Web Engagement might see that a customer is likely to abandon a purchase, so it proactively sends them a pop-up that says "Let's chat!" At that point, the customer can click an Accept button and your agents have an opportunity to help them complete their purchase.
Most of the information that Genesys Web Engagement works with is focused on your customers. This data helps you pinpoint the ones who are most likely to respond well to a proactive invitation.
This works great when you have enough agents:

But what if a customer accepts an engagement offer—and your agents are too busy to answer?

That's what pacing is for. A pacing algorithm helps you manage your agent load by comparing it to your traffic and predicting how many proactive invitations you can send out—without making your customers wait too long for a response from your agents.
For more information
- For a more in-depth look at the pacing algorithm and the usage methodology behind it, click HERE to download the "Pacing Algorithm Usage Methodology" Word document. See download tips
- If you want to combine proactive (outbound) and reactive (inbound) traffic, find out more about how Web Engagement handles dual pacing.
- You can also customize the way the pacing algorithm is used in the Engagement Logic Strategy. For details, see Accessing Pacing Information from the Engagement Logic Strategy.
To enable the pacing algorithm, complete the procedures below.
Configuring your optimization model
Note: Starting with version 8.5.000.33, Web Engagement allows you to use Agent Group objects as the primary way to configure pacing settings. You can still configure these settings in the Web Engagement Cluster or Web Engagement Server application objects—as shown in this section and the following section—but settings configured in the Agent Group objects have a higher priority.
Complete this procedure to enable the pacing algorithm to predict traffic for your Web Engagement solution.
Start
- Open Genesys Administrator and navigate to Provisioning > Environment > Applications.
- Edit the Web Engagement Cluster application and click the Options tab.
- In the [pacing] section, set the algorithm option. The supported values are:
- SUPER_PROGRESSIVE — Recommended for small agent groups (1-30 agents); only proactive traffic is predicted.
- SUPER_PROGRESSIVE_DUAL — Recommended for small agent groups (1-30 agents); both proactive and reactive traffic are predicted.
- PREDICTIVE_B — Recommended for bigger agent groups (start from 30 agents); only proactive traffic is predicted
- PREDICTIVE_B_DUAL — Recommended for bigger agent groups (start from 30 agents); both proactive and reactive traffic are predicted.
- Set the optimizationTarget option. The supported values are:
- ABANDONMENT_RATE — Percentage of interactions that will be abandoned.
- BUSY_FACTOR — Percentage of time during which an agent plans to be busy with an interaction-related activity.
- Set the optimizationGoal option. The value you set for this option depends on the value you set for optimizationTarget:
- If your optimization target is ABANDONMENT_RATE, Genesys recommends that you use small values. For example, from 3 to 5.
- If your optimization target is BUSY_FACTOR, Genesys recommends that you use big values. For example, from 70 to 85.
- If you chose a dual algorithm in Step 3 (SUPER_PROGRESSIVE_DUAL or PREDICTIVE_B_DUAL), specify a value for the proactiveRatio option.
- This option basically controls the minimal percentage of agents that will be reserved for processing proactive engagement interactions.
- Set the refreshPeriod option. This option controls how frequently the pacing algorithm provides predictions. Genesys recommends that you use values from 1 to 5.

End
Next Steps
Configuring the agent groups
In the previous procedure, you set the algorithm option according to the size of your agent group and the type of traffic the algorithm should handle. In this procedure, you configure your agent groups for the pacing algorithm to use.
When you install Genesys Web Engagement, the Provisioning Tool automatically creates the following agent group:
- Web Engagement Chat
In the steps below, you'll confirm that the agent group was created and then add agents to it.

Start
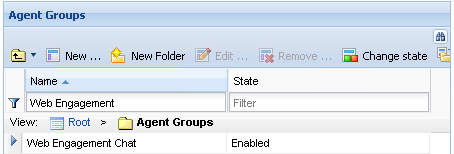
- Open Genesys Administrator and navigate to Provisioning > Accounts > Agent Groups. Make sure that the Web Engagement Chat group is created. You can use the filter to display the groups.
 The default agent groups
 - Navigate to Provisioning > Accounts > Users.
- Select an agent that should manage Web Engagement interactions and click Edit....
- Select the Agent Group tab and click Add. The Browse dialog opens.
- Select one of the groups and click OK.
 The agent named Spencer now belongs to the Web Engagement Chat group.
 - Repeat Steps 3-5 for each agent you want to add to the chat agent group.


End
Using Agent Groups to configure pacing settings
Starting with version 8.5.000.33, Web Engagement allows you to use Agent Group objects as the primary way to configure pacing settings. You can still configure these settings in the Web Engagement Cluster or Web Engagement Server application objects, but settings configured in the Agent Group objects have a higher priority.
Note: You must enable the Access to Web Engagement Pacing Configuration privilege for any users who need to control pacing settings.
To view and manage pacing configuration settings for Agent Groups, open the Genesys Web Engagement Management interface and select Pacing. To access the Genesys Web Engagement Management interface, open a browser and go to:
http(s)://<GWE Load Balancer host>:<GWE Load Balancer port>/server
The load balancer will redirect requests from <GWE Load Balancer port> to the port with the ID ui, as defined in the Genesys application (see Configuring the Cluster Application).
You'll be prompted for a user ID and password. After you log in, you can select Pacing to view and manage the pacing configuration settings. From the Pacing page, you can manage Agent Groups that have been added to the list, or add new groups. Note: You can still configure these options in the Web Engagement Cluster or Web Engagement Server application objects, but options configured on the Pacing management page have a higher priority.
Adding a group
To add a new agent group, click Add group, and use the search bar (or browse the list) to find the group you want to add. Click Add to add the group to the Agent Groups list:

After a group is added to the Agent Groups list, it no longer appears in the list of available groups that can be selected when you click Add group.
Sorting and filtering agent groups
You can sort the Agent Groups list by Name, or use the search button to filter the list or locate a specific group:

Deleting a group
If you hover your mouse over a group, a trash icon appears, which you can click to delete the group:

After you click the trash icon, you'll be asked to confirm the deletion. Click Delete to remove the selected group and its configuration settings.
Editing the pacing configuration options for a group
Selecting a group will display its options on the right:

You can then select the desired pacing configuration options. (If you make an invalid entry or selection, the management tool will prompt you to correct the error.)
| Pacing Algorithm To Use | Specifies the type of pacing algorithm to be used by the system. Changes take effect after server restart. |
| Optimization Goal | Specifies the optimal percentage value for your chosen optimization target, which can be either ABANDONMENT_RATE or BUSY_FACTOR, as specified in the Optimization Based On field that appears just below this field. |
| Optimization Based On | Specifies whether to optimize based on ABANDONMENT_RATE or BUSY_FACTOR. Changes take effect after server restart. |
| Percentage Of Proactive Traffic | Specifies the minimum percentage of agent resources that are reserved for handling proactive interactions. If 0 is specified, no resources are specifically allocated to handle proactive interactions, but proactive traffic is still allowed.
If 100 is specified, all resources are allocated to handle proactive interactions and no reactive interactions are allowed. |
| Recalculation Interval | Specifies the frequency, in seconds, of predictions produced by the pacing algorithm. Changes take effect after server restart. |
| Media | Indicates the interaction type (for example, chat). This value cannot be changed. |
| Interaction Queues | A list of the channels and queues used for tracking engagements. Note:
|
When you are finished making changes, click Save. You can also click Cancel to roll any changes back to their original settings.
Next Steps
- Return to the Genesys Web Engagement Features page.