Contents
Deploying Privacy Manager
Prerequisites
- Genesys Administrator Extension (GAX) 8.5.210.14 or later
- UCS 8.5.200.08 or later
- Classification Server 8.5.110.03 or later
- If a previous version of Privacy Manager was installed on the current host, uninstall that version.
Important
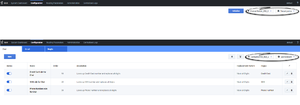
One UCS instance can support multiple tenants in Privacy Manager, and each tenant's data is stored separately from other tenants. The graphic below shows two tenants (Environment and Tenant_extra) using one UCS instance (ContactServer_852_2). The Environment tenant has data that is not accessible in the Tenant_extra tenant.Create a Zip File
- Create a temporary folder on your desktop.
- Copy the IP folder from the original location (typically, the product CD) into the temporary folder.
- Copy the templates folder from the original location into the temporary folder.
- Zip the temporary folder.
Alternatively, contact Genesys Customer Care to obtain the required Zip file containing the installation package and associated templates.
Installing the plugin
Local Control Agent 8.5.100.31 or higher
- Upload the Privacy Manager installation package (IP) to GAX. Refer to the GAX documentation for more information.
- Extract the IP to any folder.
- Navigate to the ip folder in the extracted folder.
- Do one of the following:
- On Windows, run setup.exe.
- On Linux, run install.sh.
- Restart GAX.
Local Control Agent 8.5.100.29 or lower
- Add the following option to the Application Options tab of the Genesys Administrator Extension (GAX) Application object:
- Section name: [asd]
- Option name: plugin_ip_list
- Option value: PrivacyMng64 (for the Windows host) or PrivacyMng (for the Linux host)
- TipThis option is also used by Content Analyzer Plug-in for GAX and Privacy Manager Plug-in for GAX. If you are running both Privacy Manager and eServices Manager with Content Analyzer, the value can be a comma-separated list; for example, eSMngrPlgnAdm,PrivacyMng,CntAnlzPlgnAdm.
- Restart GAX.
- Upload the Content Analyzer installation package (IP). If you previously uploaded the IP, you must do so again now.
- Carry out the plug-in installation process.
- Restart GAX.
Uninstalling the plugin
On Linux
- Stop GAX.
- Go to <GAX_HOME>/webapp/WEB-INF/lib on the file system (where <GAX_HOME> is your home folder for the GAX application).
- Delete the privacy-manager-plugin-<$version$>.jar file (where <$version$> is the version of the plugin).
- Go to <GAX_HOME>/plug-ins on the file system.
- Delete the privacy-manager-plugin-<$version$>.jar file.
- Go to <GAX_HOME>/webapp/plugins on the file system.
- Delete the privacy-manager-plugin folder.
- Start GAX.
On Windows
- Stop GAX.
- Go to Programs and Features.
- Find and run Genesys Privacy Manager Plug-in for GAX <$version$> (where <$version$> is the version of the plugin).
- Select the Remote check box.
- Click Next.
- Click Yes in Confirm Windows.
- Click Finish.
- Go to <GAX_HOME>/webapp/plugins on the file system (where <GAX_HOME> is your home folder for the GAX application).
- Delete the privacy-manager-plugin folder.
- Go to <GAX_HOME>/plug-ins on the file system.
- Delete the privacy-manager-plugin-<$version$>.jar file.
- Start GAX.
This page was last edited on February 11, 2020, at 03:44.
Comments or questions about this documentation? Contact us for support!

