Contents
High Availability
High Availability with Amazon Web Service (AWS)
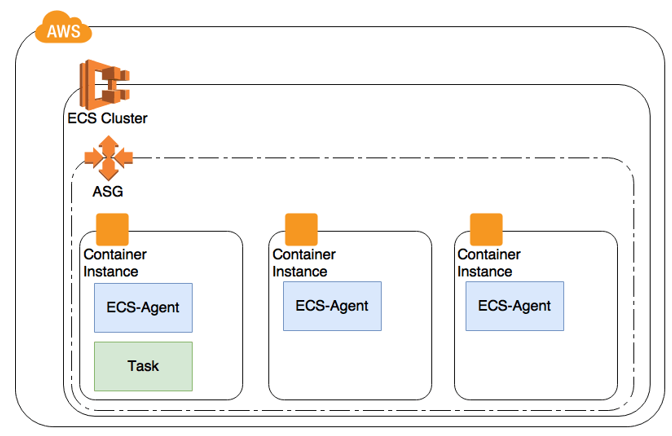
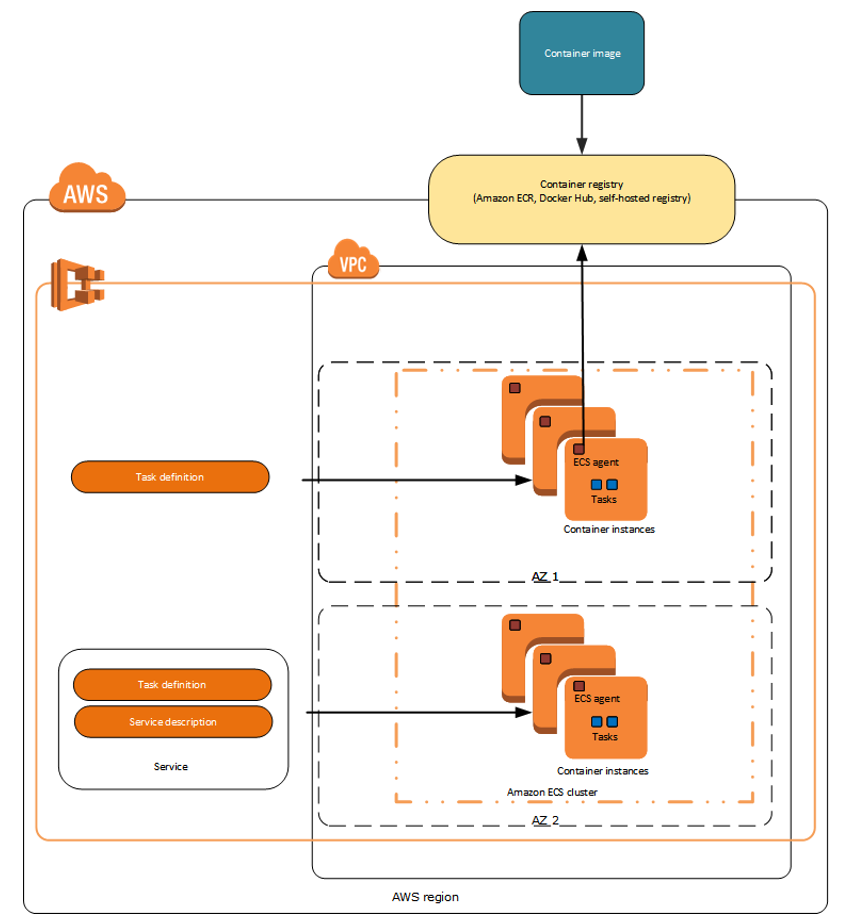
Each Genesys product component is ensured high availability by implementing active-active configuration. If you host the product on public cloud (such as AWS), the container cluster is deployed within Auto Scaling Group (ASG). This ensures that a minimum number of specified containers run to serve the traffic.
ASG is also deployed across multiple Availability Zones (AZ) to ensure availability in case of zone failure.
High Availability with Kubernetes
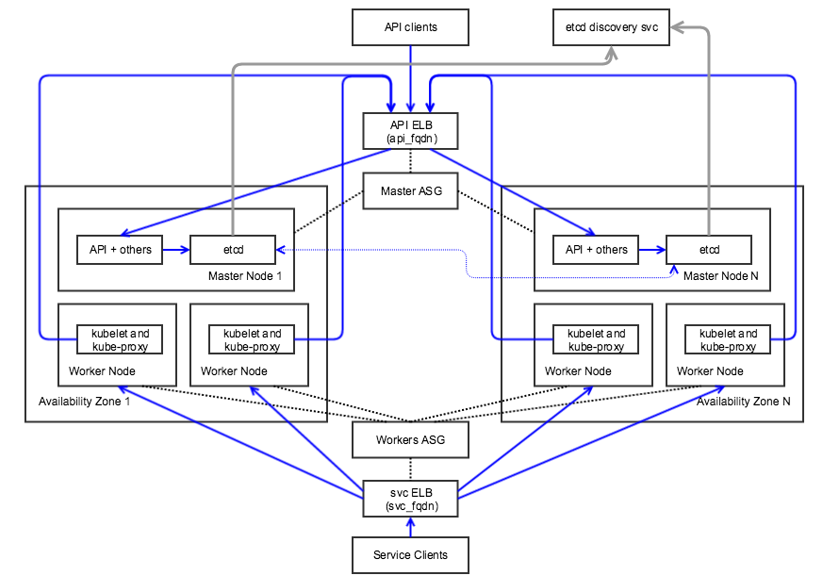
You can deploy a Genesys product in a private cloud or on premise. During such deployment scenarios, containers are implemented on container orchestration platforms such as Kubernetes.
Kubernetes clusters enable a higher level of abstraction to deploy and manage a group of containers that comprise microservices in a cloud-native application. A Kubernetes cluster provides a single Kubernetes API entry point, cluster-wide resource naming scheme, placement engine and scheduler for pods, service network routing domain, and authentication and authorization model.
Kubernetes can be deployed in the following scenarios:
- Across multiple availability zones, but within a single cloud provider — Cloud provider services like storage, load balancers, network routing may interoperate easily.
- In the same geographical region — Network performance will be fast enough to act like a single data center.
- Across multiple geographical regions — High network cost and poor network performance may be prohibitive.
- Across multiple cloud providers with incompatible services and limited interoperability — Inter-cluster networking will be complex and expensive to set up in an efficient way.
Container Orchestration with Kubernetes
Auto-scaling with Kubernetes
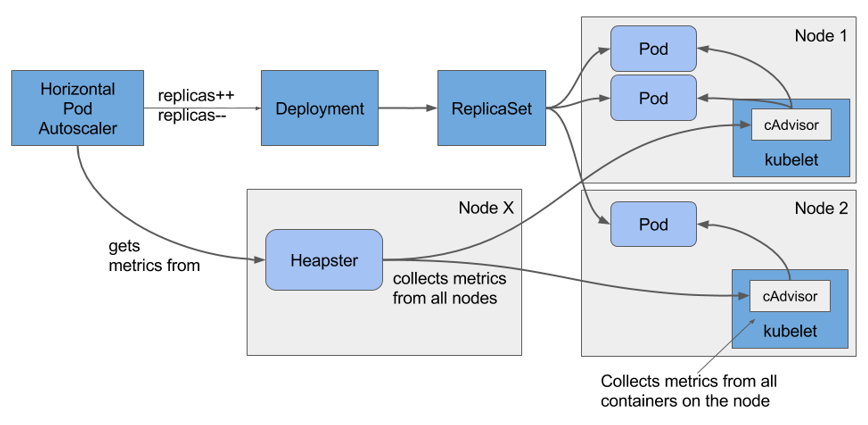
Kubernetes pods can be auto-scaled up or down based on metrics such as CPU and memory utilization. Kubernetes implements Horizontal Pod Autoscaler (HPA) to achieve auto-scaling. HPA collects metrics about pods from Heapster. Based on the auto-scaling rule, HPA either increases or decreases the number of pods through the deployment object created for the Genesys microservice. The following diagram illustrates the auto-scaling architecture with HPA and Heapster.
Kubernetes Setup with Rancher
Rancher provides an easier process to set up a Kubernetes cluster either on cloud or on premise. It hides the complex steps involved in setting up the master and worker nodes. Rancher is recommended for a push button setup of Kubernetes cluster for development and QA purposes. However, it is not recommended for production use. If you have any queries regarding Rancher, contact the Genesys Engage Architecture team (pureengagearchitecture@genesyslab.onmicrosoft.com).
To set up a single node Kubernetes cluster with Rancher, follow these steps:
- Start Rancher Server by executing the following command.
- sudo docker run -d --restart=unless-stopped -p 8080:8080 rancher/server
- Open the Rancher console using <ip>:8080 on the browser.
- On the Default menu, select Manage Environments.
- Click Add Environment.
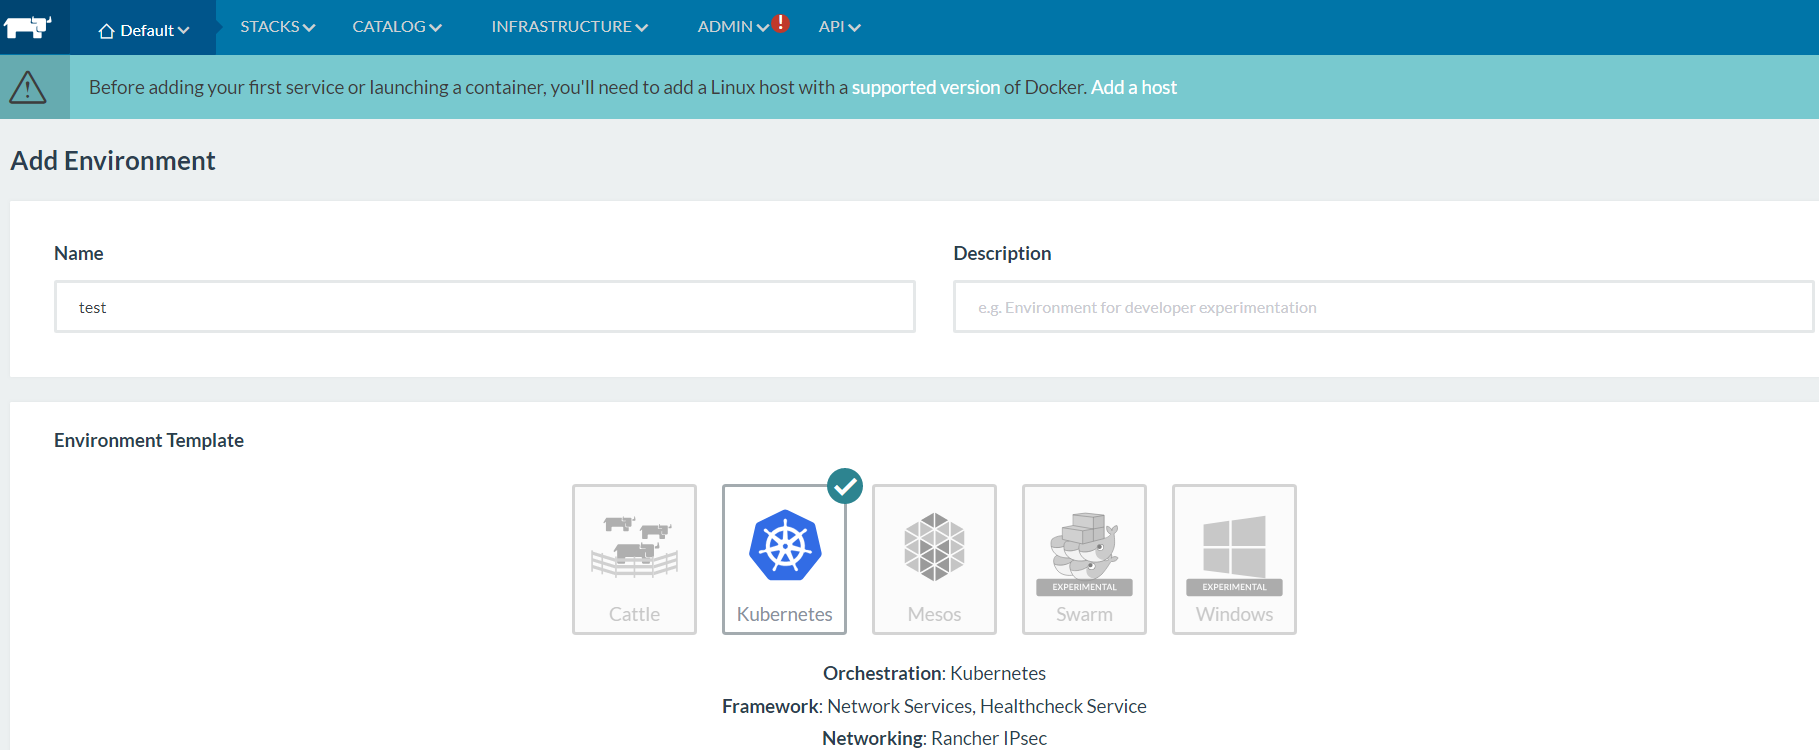
- On the screen displayed, create a new environment by providing a name in the Name field. Then, select Kubernetes as the orchestration for the new environment.
- Complete the wizard.
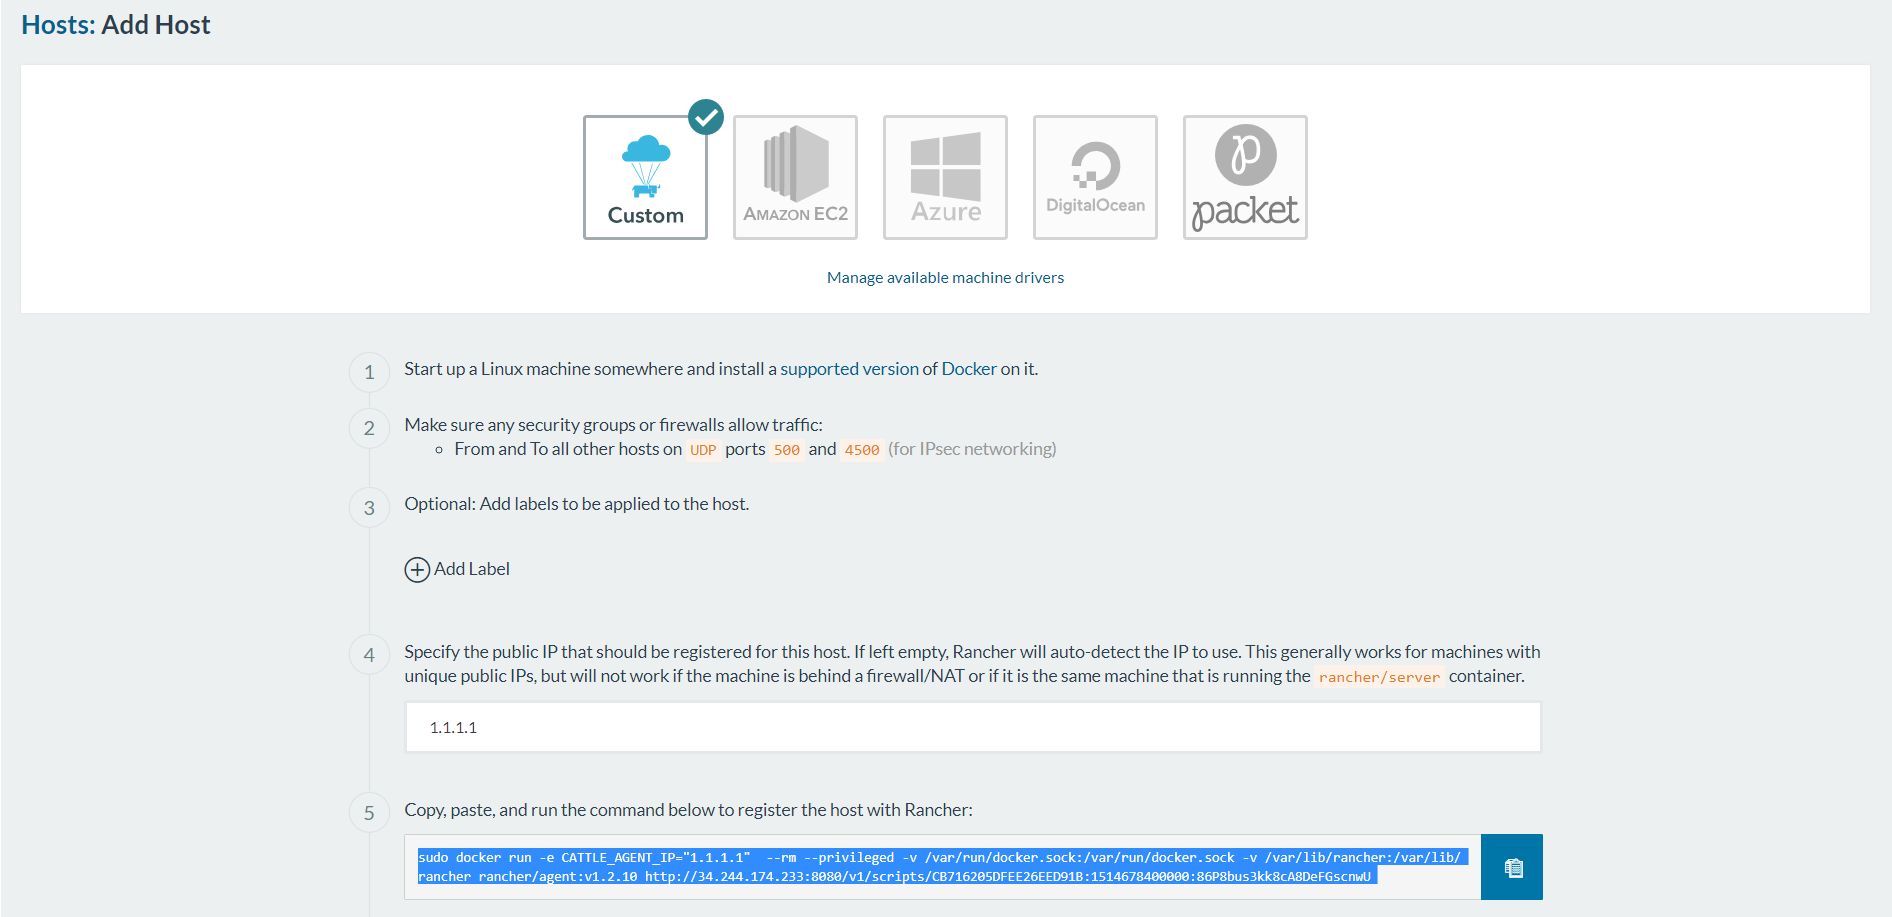
- On the INFRASTRUCTURE menu, select Hosts, and then click Add Host.
- Enter the IP of the same host (for single node cluster) or a different host (for multi-node cluster).
- Execute the command generated by the wizard on the node to be added.
- Watch the status of the Kubernetes cluster getting initialized and the services getting started.
- Navigate to the cluster environment and select CLI. The command line interface that interacts with the cluster using Kubectl command will be accessible from the browser.
- To interact with the cluster from a different computer, copy the config file that Rancher generates and paste it on the ~/.kube/config file. Create the config file if it is not available.
Kubernetes Helm for Package Management
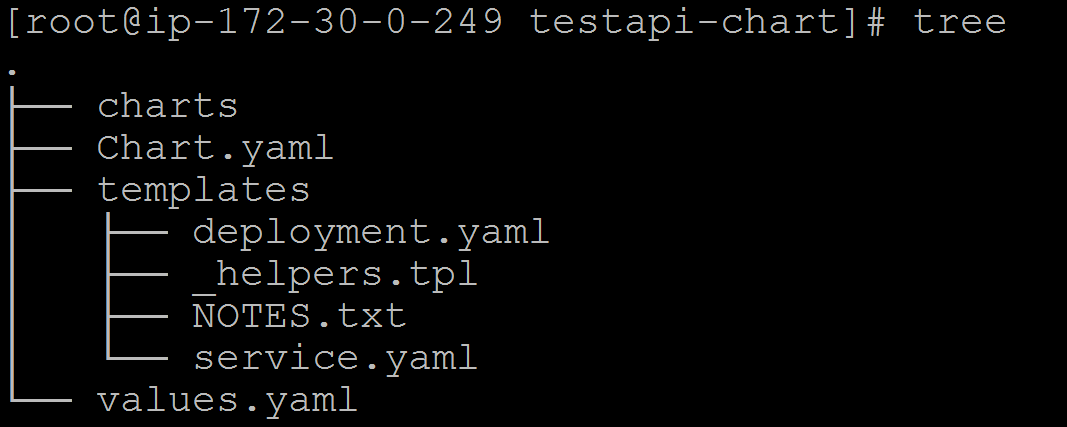
Helm is a package manager for Kubernetes. Helm packages multiple K8s resources into a single logical deployment unit called Chart. Helm is also a deployment manager for Kubernetes. It helps in:
- Performing repeatable deployments
- Managing (reusing and sharing) dependencies
- Managing multiple configurations
- Updating, rolling back, and testing application deployments (releases)
Here are the components of a typical Helm environment:
- Chart - a package; bundle of Kubernetes resources
- Release - a chart instance that is loaded into Kubernetes
- Repository - a repository of published charts
- Template - a K8s configuration file with Go template
The Genesys Kubernetes manifests are packaged as Helm charts. The charts are in .tgz format. You can download the charts from the Helm repository that will be created for each project, and then install them. The following example illustrates the steps to be followed while installing a chart from the repository.
- Download the chart from the git repository using the wget command.
- Install the chart using the helm install command as shown in the following image.
For detailed information about Helm installation, refer to https://github.com/kubernetes/helm/.

