Working with the Playground Application
Contents
The Playground application website features a header block and four other functional blocks that can all be collapsed with a click. You can use the links and buttons in these blocks to trigger chat, business rules, and business events.
PlayGround
The "PlayGround" header block displays the current page name ("Start page" in the image above) and links to the Readme file for the application.
Change instrumentation script
The "Change instrumentation script" block allows you to configure the instrumentation script on the fly, so that changes are applied without restarting the Web Engagement servers. For details about configuring the script, see Configuring the Instrumentation Script.
Reactive engagement
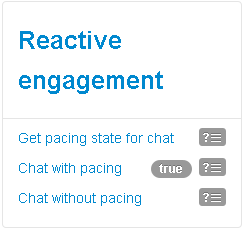
The "Reactive engagement" block allows you to initiate chat interactions with an agent simply by clicking a link.
The block contains three links that demonstrate reactive chat, with and without the pacing algorithm.
- Get pacing state for chat — Displays true if the pacing algorithm allows reactive chat and false if the pacing algorithm doesn't allow reactive chat. See Configuring the Pacing Algorithm for details.
- Chat with pacing — Opens a registration form for a chat if the pacing algorithm allows reactive chat.
- Chat without pacing — Opens a registration form for a chat, regardless of whether the pacing algorithm allows reactive chat.
You can modify the code for each of the actions by clicking the related view code button ![]() , making your changes, and then clicking Save.
, making your changes, and then clicking Save.
Proactive engagement
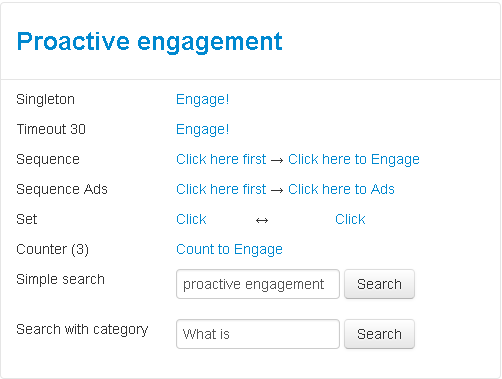
The "Proactive engagement" block contains a set of links that trigger business rules. Clicking one of these links changes the address of the page, the page title, and the name of the page in the "PlayGround" header block. In this way, the application simulates a functioning multi-page website.
To trigger business rules, the following conditions must be true:
- All system components must work. See Step 8 in Installing Genesys Web Engagement for component information.
- The website must have a properly configured instrumentation script in the "Change instrumentation script" block.
- All resources fro the instrumentation script should be available.
- There are available agents for the selected media channel.
- The invitation limit (3 by default) should not be exhausted. The invitation limit is set in the Engagement strategy for the application. See Engagement Policy (Decision Workflow) for details.
Here is a summary of events when you trigger a business rule:
- The application displays the engagement invitation. You can accept, reject, or ignore the invite.
- If you ignore, the invitation disappears. If you reject, the invitation closes.
- If you accept and are logged in (see the "User info" block for details), the application does not display the registration form and you begin the chat session.
- If you accept and are not authorized, the application displays the registration form. If you complete the registration form, the information is passed on to the agent in Interaction Workspace. If you do not complete the registration form, you communicate with the agent as an anonymous user.
The Proactive block lets you try out different business rules based on the default rule templates included with Genesys Web Engagement. See Creating Business Information for details about rule templates and Deploying a Rules Package for more information about rules.
| Business Rule | Description |
|---|---|
| Singleton | Entrance to the page is specified in the PlayGround-Singleton category. This example demonstrates the interaction of a specific page with the business logic.
Category: PlayGround-Singleton |
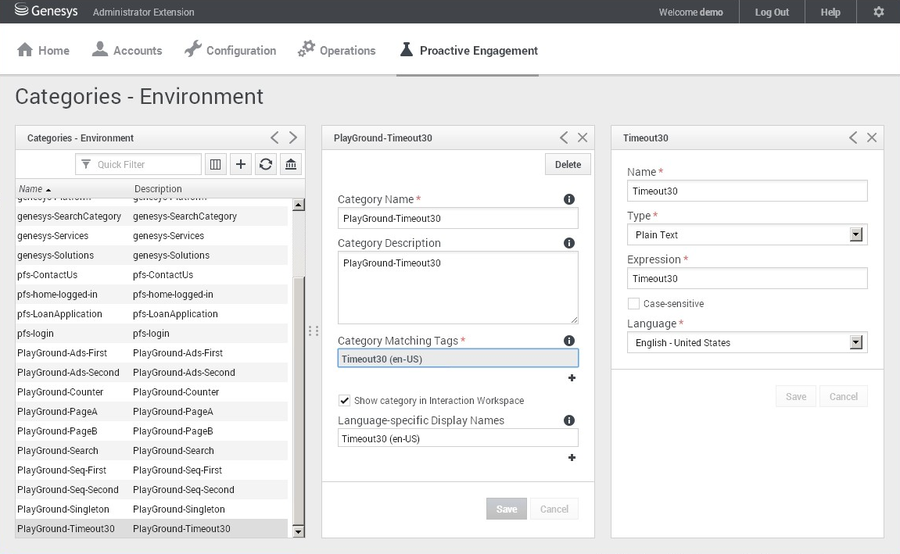
| Timeout 30 | Entrance to the page is specified in the PlayGround-Timeout30 category. A business rule is triggered after a 30-second delay. This example demonstrates the use of the delay on the page.
Category: PlayGround-Timeout30 |
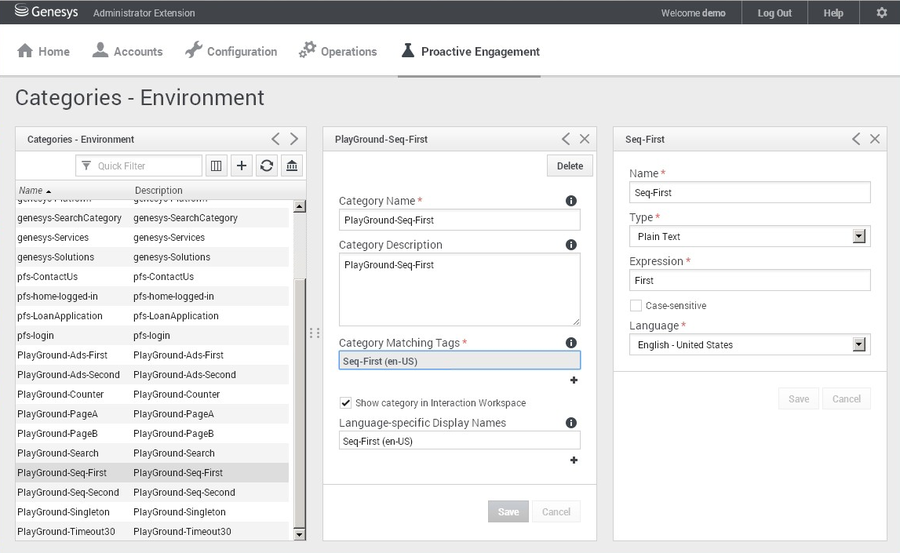
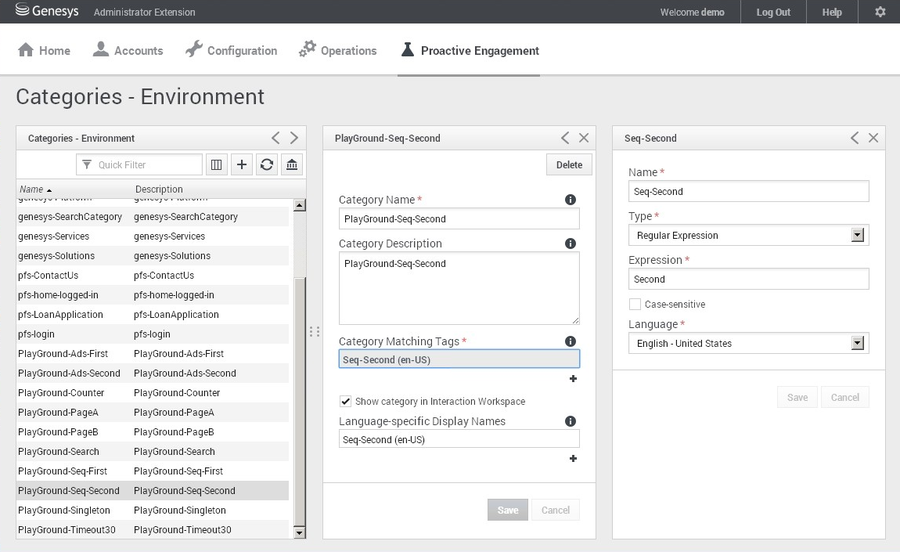
| Sequence | Serial input to the first page "First", then on page "Second". The sequence may be any length. For example, this could be extended to check if all the necessary pages of a "Wizard" have been successfully completed.
Categories: PlayGround-Seq-First and PlayGround-Seq-Second |
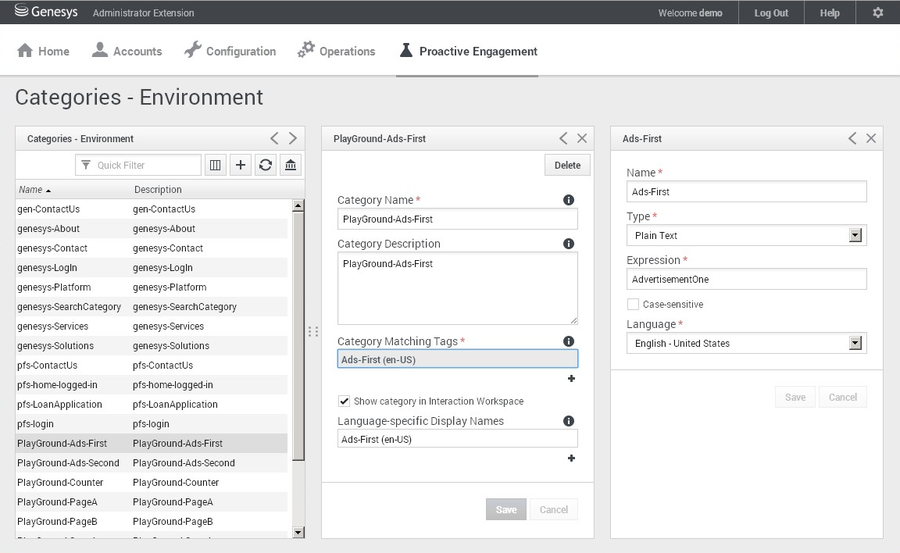
| Sequence Ads | Serial input to the first page "AdvertisementOne", then on page "AdvertisementTwo". The sequence may be any length. For example, this could be used to display advertisements.
Categories: PlayGround-Seq-First and PlayGround-Seq-Second |
| Set | Bypassing pages set in any order. The user can go to PageA, then on to PageB, or vice versa. This example could be used to demonstrate triggering business rules when filling in all the fields in a form.
Categories: Playground-PageA and Playground-PageB |
| Counter (3) | Counts multiple entries on the same page.
Category: Playground-Counter |
| Simple search | Search for a specific keyword. The keyword is hard-coded in the business rule. |
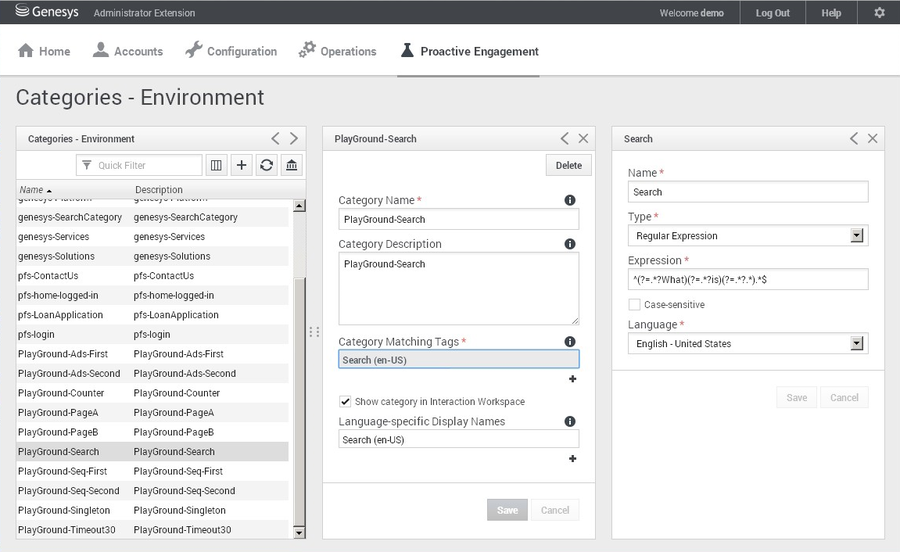
| Search with category | Search for a specific keyword. The keyword is defined by the PlayGround-Search category. A regular expression can be used to describe the keyword.
Category: PlayGround-Search |
User info
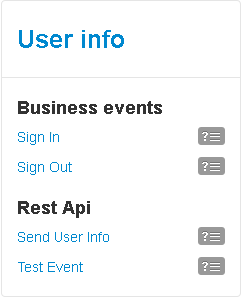
The "User info" block contains links to send events that are generated by the Monitoring JS API. All events in this block can be modified by clicking the related view code button ![]() and then Save. You can use the user information to manage registration (from the registration form for the authorized user) and send the necessary information to the agent.
and then Save. You can use the user information to manage registration (from the registration form for the authorized user) and send the necessary information to the agent.
This block demonstrates four generated events:
- Sign In — Send the authorized user login event.
- Sign Out — Send the authorized user log out event.
- Send User Info — Send events with user information. You can use this event to identify an authorized user who has previously visited the site.
- Test Event — Send special events, which may contain any useful information. This information may be predetermined or dynamically obtained from the page. For example, the contents of a shopping cart or certain fields in a form.


