Contents
- 1 Creating Applications and Modules
- 1.1 Creating applications and modules
- 1.2 Selecting a template
- 1.3 Using the Callflow Editor
- 1.4 Understanding settings inheritance
- 1.5 Setting Opening Hours Rules
- 1.6 Testing your application
- 1.7 Deploying to Production
- 1.8 Updating application or module details
- 1.9 Deleting applications and modules
Creating Applications and Modules
Applications, menu modules and prebuilt modules all allow callers to perform specific self-service tasks over the phone. Callers dial into the application, rather than into individual modules. The application holds all the defaults, global commands, reusable prompts and error-handling paths (as well as the agent path).
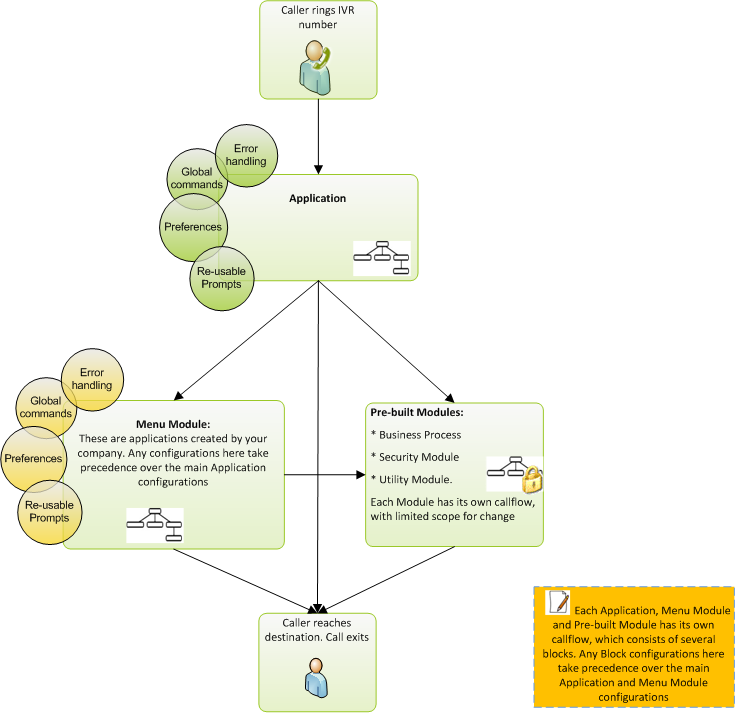
This main application is based on the Standard Application Template. This template allows you to call into a menu module or a prebuilt module. Menu modules can also call into prebuilt modules, as illustrated in the graphic below:
Applications, menu modules and prebuilt modules can all have their own error-handling, global commands, callflow defaults and reuseable prompts. However, except from callflow defaults, you cannot change these settings for pre-built modules.
Creating applications and modules
You can create an application or module from the following locations:
- Show Graphical View – Click Create New Module in the toolbar.
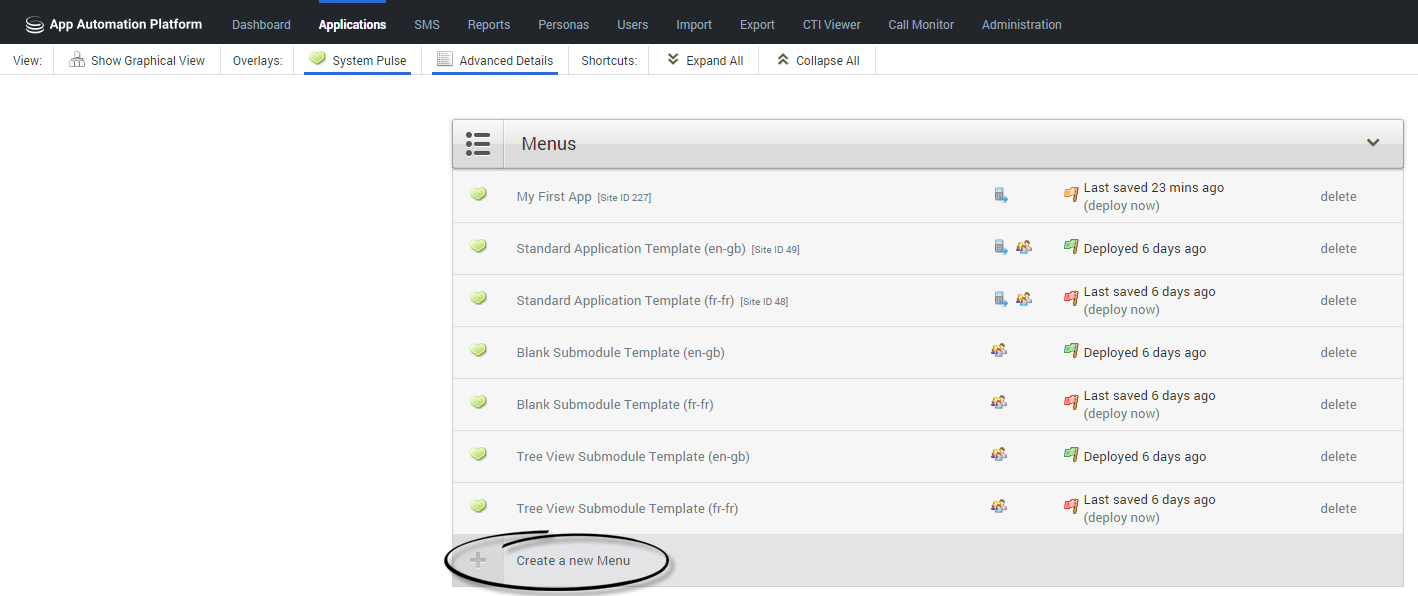
- Applications view – Click Create a new ... in the desired section. For example, to create a new menu module, go to the Menu section and click Create a new Menu.
Selecting a template
Next, you must select a template on which to base the module. Each template provides the framework that brings together common elements, such as Start blocks, links to other modules, and more.
After you select a template, a panel appears on the right in which you can enter a name and description for your module.
- Menus - These allow you to set up your own callflow using the Callflow Editor.
- Security Modules, Business Processes, or Utility Modules - You cannot edit the callflow of these modules. However, when you view these modules in the Callflow Editor you might see additional tabs that allow you to configure the default behavior of the callflow.
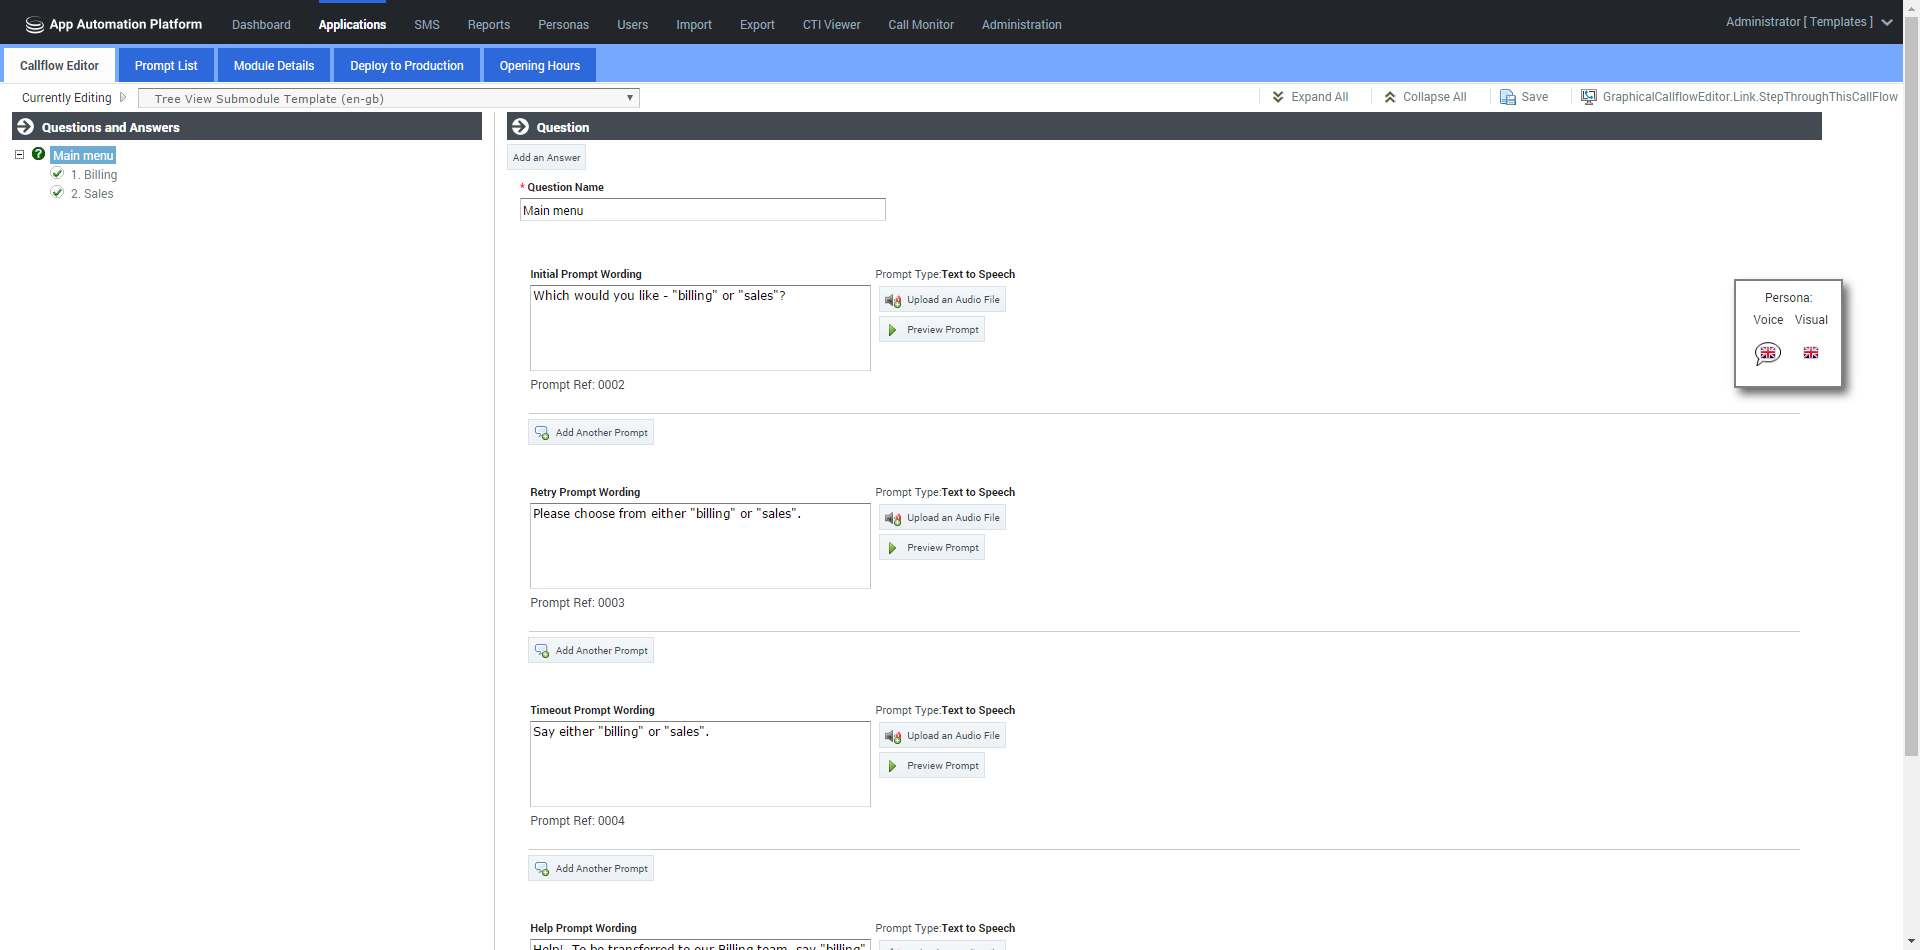
Using the Tree View Submodule Template
Using the Callflow Editor
After you create an application, it opens in the Callflow Editor so you can design it to suit your business purposes.
Callflows consist of various blocks and paths that outline the steps the application must follow when interacting with a caller. See the Using the Callflow Editor page for more information.
Prompts
Prompts can be found in Menu, Message, or Phone blocks. You can play prompts using either TTS (Text To Speech) or prerecorded audio files. Refer to the Prompts page for more information.
Understanding settings inheritance
Understanding the inheritance order enables you to set useful defaults in your main application but override them in specific situations for a particular submodule or block.
For example, you might set the Maximum retry count at 1 in the main application but use a higher value for a particular Question block in a submodule that asks a complex question that often takes callers a few attempts to answer. You might also have a particular "Yes/No" question within that submodule that says, "If you don't know the answer just stay silent." To do so, set the Maximum no input count value to 0 for that specific Menu block.
Applications and modules inherit settings in the following order:
Callflow preference inheritance
Callflow preferences are inherited in the following order:
- Current block.
- Current module defaults.
- Calling module defaults.
- Main application defaults.
- Current server settings page.
Paths and menu option settings are inherited in the following order:
- Current block.
- Current module defaults.
- Calling module defaults.
- Main application defaults.
Setting callflow preferences
The Preferences tab in each block dialog box allows you to apply specific rules as to how a call is handled. Refer to the Preferences page for more information.
Setting Opening Hours Rules
GAAP uses Opening Hours Rules throughout an application. These rules allow you to specify at which time and on which days a call can be transferred to a specific number. For example, you can apply an Opening Hours Rule to a Phone block to specify what happens if your company is closed:
- Click the Opening Hours tab.
- Click Create a New Rule.
- Enter a name in the Rule Name field.
- In the Weekday Opening Hours section, specify which days of the week that your office is open. For each day, select either Open, Closed, or Timed. If you select Timed, specify the opening hours on that day.
- In the Special Dates section, specify special dates when the usual opening hours do not apply. For example, you can add New Year's Day and select Closed for status.
- In the Actions section, specify what you want to happen if the call occurs outside of the opening hours. Select one of the following options from the Suggested Action If Closed list:
- Transfer – Transfers the call to another telephone number. You can add several numbers, using a comma-separated list. The system moves on to the next number in the list until the call is answered, or until a no answer event.
- End the call – Ends the call and returns a system hangup result.
- Other – Specifies another event to trigger (for example, main menu).
- Click Save.
Testing your application
You can test your application within the Callflow Editor by using the Virtual Call or WebIVR feature.
In the Test your App menu, select whether you want to use the Test or Production version of your application, then click Virtual Call or Web IVR.
Refer to the Virtual Call or WebIVR pages for more information on using this feature.
Deploying to Production
After you make changes to a callflow, you can use GAAP to simultaneously deploy a complete IVR application and its associated submodules to your production environment, with the new callflows being applied to the very next call. You do not need to restart GAAP to deploy changes. Any calls already in progress will be completed using the original callflow.
You can test changes before you deploy them to production. GAAP provides you with both a test IVR number and a production IVR number. The latter is used to handle live customer calls, while the test IVR number allows you to test applications before deploying them to production. You can test changes made to an application by dialling into the test IVR number, enabling you to experience exactly how the application will perform in live operation.
After deployment, you can roll back the changes to a previous configuration. GAAP maintains a record of each new configuration with the option to retrieve a previous deployed configuration and use it as the basis for further configuration changes. For example, you might apply specific changes to the IVR to cope with changes in demand during a holiday period. After this period ends, the preholiday version of the IVR can be redeployed as the basis for further changes.
To deploy an application:
- Perform one of the following options:
- In the Callflow Editor, click the Deploy to Production tab.
- In the Applications view, ensure Advanced Details is active and then click deploy now beside the application you want to deploy.
- Enter a description in the Reason for Deploying field. This description identifies the main change in this version of the application (for example, Updated welcome prompt wording).
- (Optional) Enable the Deploy this application's submodules as well to deploy the submodules linked to this Application.
- Click Deploy to Production Now.
The table at the bottom of the Deploy to Production tab lists all previous deployments, including the version currently in production. In the Actions column, you can choose:
- Delete - Delete a previous version of the application.
- Copy to Test Number - Copy this version to the test number so you can conduct tests. This action overwrites the current test version.
To roll back to a previous version:
- Click Copy to Test Number beside the version you want to restore.
- Click OK when asked if you want to overwrite the current test module.
- Place some test calls to ensure you are happy with the test version to which you have just rolled back.
- Repeat the steps to deploy an application.
Updating application or module details
To update application or module details:
- In the Callflow Editor, click the Application Details or Module Details tab.
- Update the application or module name and description as needed.
- Click Save.
Deleting applications and modules
To delete an application or module:
- Click Applications in the navigation bar.
- Click Advanced Details.
- Click delete beside the application or module that you want to delete.
When you delete an application or module, all accompanying data and prompts are also deleted.


