Journey Timeline Plugin for Workspace Desktop Edition
You can download source and binaries by clicking on the following links, then install files in Workspace Desktop Edition and customize them with the Microsoft Visual Studio project available in the Source zip file.
| Binaries for Workspace Desktop Edition 8.5.x | CS_JourneyTimeline_Bin.zip |
| Microsoft Visual Studio project for advance customization | CS_JourneyTimeline_Src.zip |
Contents
What is the Journey Timeline Plugin?
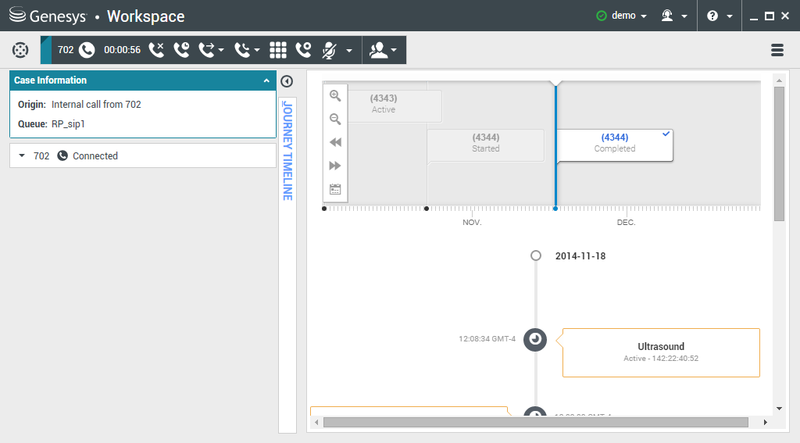
This sample displays the Context Service Journey Timeline feature in Workspace Desktop Edition for agents who own administrator or supervisor role in Context Services.
The plugin becomes actives when an interaction is available in Workspace and if the sample can retrieve the Customer ID from the User Attached Data (by default, the plugin looks for "customer_id"). Then, the agent can show up the plugin's panel and access the timeline features for the customer. These features enable the agent to:
- Manage the timeline (expand or contract) by using the icons in the left menu sidebar.
- Navigate to services by using the icons in the left menu side-bar, or simply left click in the timeline to move it.
- Select a service and get a state and task vertical timeline, which shows the service's contents.
Prerequisites
- Workspace Desktop Edition 8.5.x
- Genesys Mobile Services 8.5.x and higher for Context Services.
- See installation guidelines for details.
- (optional) Microsoft Visual Studio Express 2013 to customize the sample.
Installing the Sample
Start
- Download the binary files and extract them to the Interaction Workspace installation folder.
ImportantMake sure that the binary files are extracted into the same folder than InteractionWorkspace.exe.
- Assign Context Service permissions to your agent. Tell me how.
- In Genesys Administrator or in Configuration Manager, open your Workspace Desktop Edition application and select the Options tab.
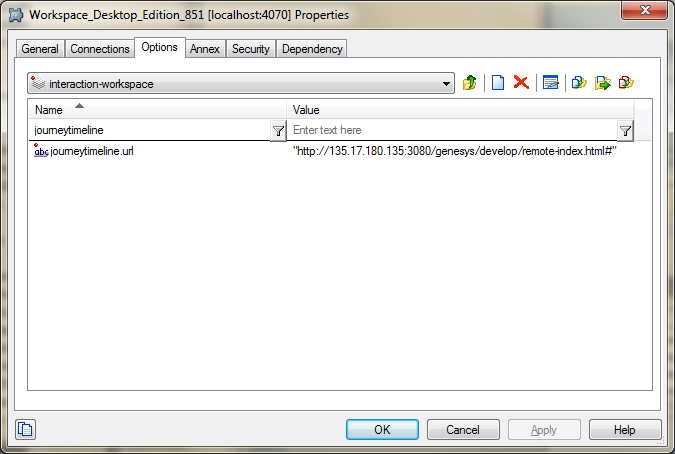
- Create the interaction-workspace/journeytimeline.url option and set its value to the location of the Journey Timeline interface in the GMS Service Management User interface. Usually, this URL is http://<GMS Local Host>:8080/genesys/develop/remote-index.html#.
- (Optional) Create the interaction-workspace/journeytimeline.id_key option and set its value to the key of the Customer ID in the interaction's attached data. By default, this key is customer_id.
End
Running the Sample
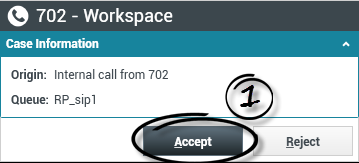
To run this sample, just start Workspace Desktop and log in as an agent who owns correct roles. Once you accept an interaction, you can use the timeline panel.
2. Expand the Journey Timeline panel.

3. You can now use the sample.

Advanced Customization
- Download the Visual Studio project (CS_JourneyTimeline_Src.zip below) and extract the files to create a folder CS_JourneyTimeline_1.0.
- Open the Genesyslab.Desktop.Modules.JourneyTimeline.sln file in Visual Studio.
Download CS_JourneyTimeline_Src.zip
About the Source Code
- package.config is used by NuGet Package Manager (see the Tools menu in Visual Studio 2013) and it contains references to Chromium Embedded Framework (CEF) for download, install, and use.
- JourneyTimelineModule.cs is the entry point of the module.
- JourneyTimelineConfig.cs reads the Workspace Web Edition options for the Journey Timeline module.
- BoundAuth.cs implements the object that will be shared in JavaScript with the Chromium browser for GMS authentication access.
- JourneyTimelineView.cs contains the panel and the Chromium browser.
- JourneyTimelineViewModel.cs implements the view controller (read customer Id, load browser, get the Timeline URL).
Compiling Procedure
- This project is primarily dependent on the IWS libraries. To ensure that the dependency libraries are available to the project build process, copy the contents of <Workspace Web Edition Install Folder>/InteractionWorkspace (folder containing InteractionWorkspace.exe) to the build target folder. You can do this by editing the Project Properties > Build Events > Open file > Pre-build event command line. For example: xcopy "C:\Program Files (x86)\GCTI\Interaction Workspace\InteractionWorkspace" "$(TargetDir)" /y /i /s
- When debugging, make sure that the Project Properties > Debug settings are correct.
Additional Notes
- Use NuGet Package Manager (in visual studio tools menu) to get the CEF (Chromium browser embedded: x86, x64). Chromium uses Genesys AuthInfo as a Javascript object from C# (for login/password).
- Use the customer_id key from interaction attached data in the Timeline URL to get data in Chromium.
- Change the GMS Admin UI Sample to add customer_id for test purposes (\webapp\admin\js\sample\cb\index.html)
- Use the Context Services Interface (http://localhost:8080/genesys/develop/index.html#/cs) to create the Journey Timeline for the above customer_id.
GMS configuration
[business-attributes]
map_names=true
Service.media_type=MediaType
Service.type=ContextManagementService
State.media_type=MediaType
State.type=ContextManagementState
Task.media_type=MediaType
Task.type=ContextManagementTask

[cview]
enabled=true
Workspace Web Edition Configuration
[interaction-workspace]
journeytimeline.id_key=customer_id (default)
journeytimeline.url=http://<host>:<port>/genesys/develop/remote-index.html#

