Simple Integration for Pre-Production Environment
Overview
This chapter describes the integration steps that allows you to add Knowledge Center functionality to your site without modifying any memory. To configure the integration you need to use Proxy shipped with Genesys Web Engagement product.
The GWM Proxy is a development tool that you use to add new functionality to a website without directly modifying that site. Once you have configured this proxy, you can use the Genesys Knowledge Center Sample UI from any of your websites. In a few clicks, without modifying your website, the Knowledge Center Sample UI features shows up on a set of web pages, according to the rules and categories that you created. There are two proxy tools available in the Web Engagement installation, the Simple tool and the Advanced tool. Within this instruction you need to use the Advanced GWM Proxy. For more information regarding proxy please refer to the Genesys Web Engagement documentation.
Configuring the Advanced GWM Proxy
The Advanced GWM Proxy is based on the OWASP Zed Attack Proxy Project (ZAProxy). In addition to acting as a proxy, the Advanced GWM Proxy also provides a UI and validates vulnerabilities in your website at the same time.
Before you start using the Advanced GWM Proxy, you need to carry out a few configuration procedures.
Starting the Proxy
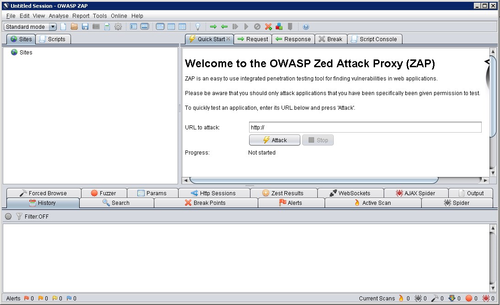
Navigate to your Web Engagement installation directory and launch either servers\proxy2\zap.bat (on Windows) or servers\proxy2\zap.sh (on Linux).
The proxy starts.
Configuring the Proxy
Once the proxy is running, you can configure it using the GUI.
Start
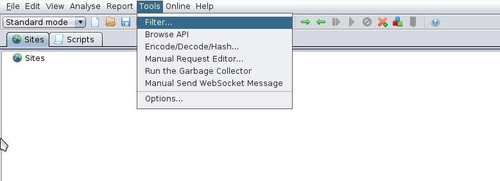
- Open Tools > Filter....
Select the Filter menu item. - In the list of filters, select Replace HTTP response body using multiple patterns and click ... to edit the filter.
Select the filter. - Click Add.
- Enter </head> in the Pattern: field of the resulting dialog box.
- Enter the following code in the Replace with: field.
- Click OK to save the pattern.
- Click OK to save the pattern.
<link type="text/css" rel="stylesheet" href="http://<link_to_resources>/gkc-knowledge-widget.min.css">
<script>
    window._gkc = {
        knowledge: {
            host: 'http://<link_to_server>/gks-server/v1',
            kbId: '<Knowledge Base ID>',
            customerId: '<ID of customer to provide to Knowledge Center>'
        },
        events: {
            windowOpenEvent: function (wdWindow) {
                console.log(wdWindow);
            },
            windowCloseEvent: function (wdWindow) {
                console.log(wdWindow);
            },
            windowHideEvent: function (wdWindow) {
                console.log(wdWindow);
            },
            kbSelectEvent: function (kbId) {
                console.log(kbId);
            },
            searchEvent: function (query) {
                console.log(query);
            },
            documentOpenEvent: function (document) {
                console.log(document);
            }
        }
    };

    window._gkcLocalization = {
        title: 'Ask',
        inputPlaceholder: 'Ask a questions',
        trendingMessage: 'Trending questions',
        loading: 'Loading...',
        noResultFound: 'No relevant results found',
        feedback: {
            question: 'Was this helpful?',
            defaultAnswer: 'Thank you for your vote',
            noCommentAnswer: 'Thank you for your vote',
            submitAnswer: 'Thanks, your feedback has been submitted',
            commentPlaceholder: 'Why wasn\'t this helpful?',
            buttons: {
                yes: 'Yes',
                no: 'No',
                submit: 'Submit',
                noComment: 'No comment'
            }
        }
    };
</script>
<script src="http://<link_to_resources>/gkc-knowledge-widget.min.js"></script>End
Configuring the URL Filter
Complete this procedure to use the GUI to configure URLs that the proxy should ignore.
Start
You can exclude a site in one of two ways:
Using the Sites Tab
- In the Sites tab, right-click on a site and select Exclude from > Proxy.
- Select a site to exclude.
Using the File Menu
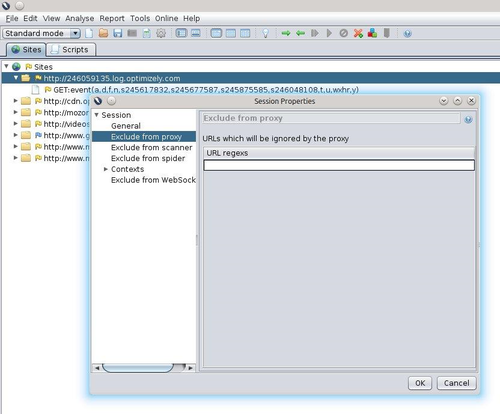
- Select File > Properties. In the Session Properties window, select Exclude from proxy, add your URL regular expression, and click OK. For example, to have the proxy include only the google.com website, use this regular expression:
- Enter a URL to exclude.
^((?!google.com).)*$If you want the proxy to remember the excluded URLs beyond the current session, select File > Persist session... and select a file to save your session to.
End
Working with the Proxy
After you have configured the proxy, keep it open and then open up a web browser. Now you can browse through the web pages that are instrumented with the Knowledge Center Sample UI, and they will be displayed in the Sites tab of the proxy GUI, as shown here:
For more information about working with ZAProxy, see https://www.owasp.org/index.php/OWASP_Zed_Attack_Proxy_Project.


