_max_request_by_time_bucket
Section: Scheduled Call
Default Value: 100
Valid Values: Any positive integer
Changes Take Effect: Immediately
Related Options: _request_time_bucket
Number of customer requests that can fit into a given time bucket. By default, the time buckets are 5 minutes, and the _max_request_by_time_bucket option is set to 100; as a result, a maximum of 100 scheduled requests can be done in the given 5 minutes bucket.
_capacity_service
Section: General
Default Value:
Valid Values: string
Changes Take Effect: Immediately
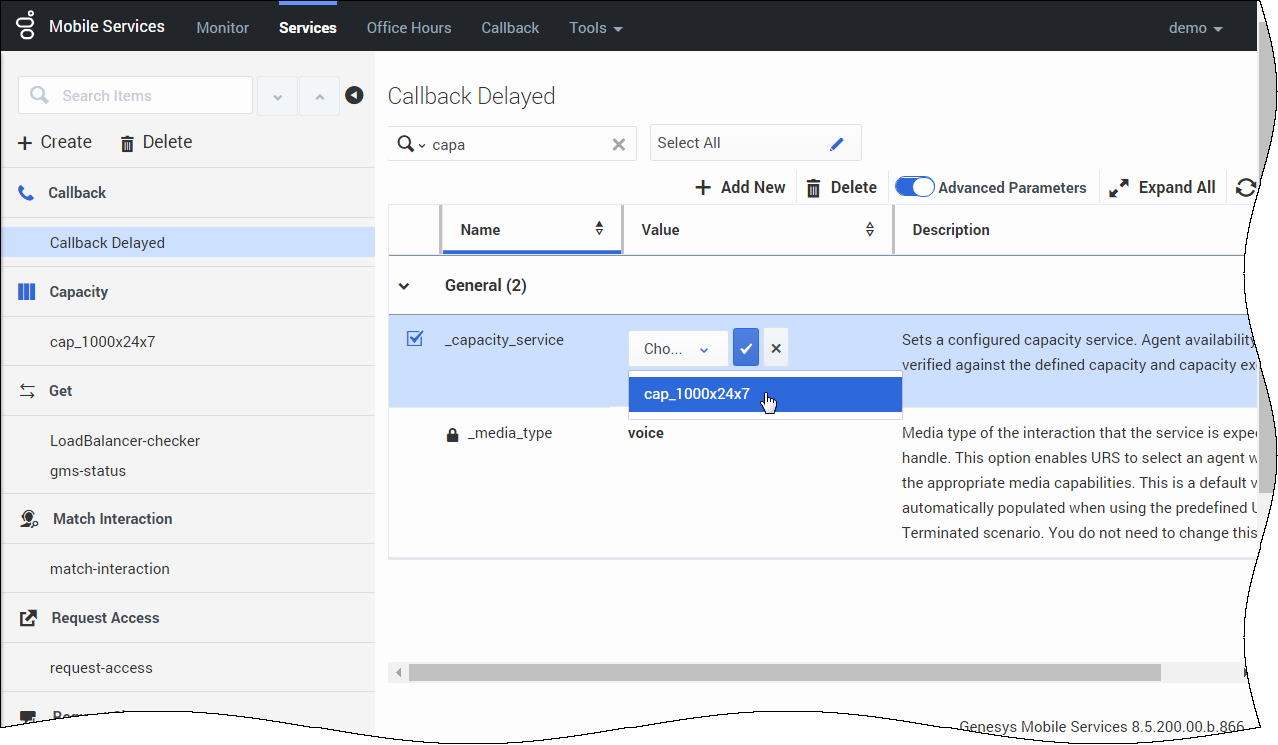
Sets a configured capacity service. Agent availability is verified against the defined capacity and capacity exceptions.
_max_request_by_time_bucket
Section: Scheduled Call
Default Value: 100
Valid Values: Any positive integer
Changes Take Effect: Immediately
Related Options: _request_time_bucket
Number of customer requests that can fit into a given time bucket. By default, the time buckets are 5 minutes, and the _max_request_by_time_bucket option is set to 100; as a result, a maximum of 100 scheduled requests can be done in the given 5 minutes bucket.
Capacity Service
The Capacity Service enables you to define the number of scheduled callbacks that are allowed for Callback for a given time slot in the week. Then, your Callback service refers to your Capacity service and to your Office Hours service to adjust the agent availability and the number of scheduled callbacks.
You can define exceptions for dates when fewer or more scheduled callbacks are available, and you can define as many Capacity services that you need to match your Callback services.
Make sure to update the existing calendar configuration to set the correct timezone for your Capacity service. For instance, if you configured "EST", or "PST" timezones with the configuration, your parameters must use the timezones defined for Java such as "America/Toronto", or "Europe/Paris". See Wikipedia to get the list of correct timezones.
Create a Capacity Service
Create a new service and select capacity in the list of templates.
Once this service is created, you can use the Capacity API.
Link your Capacity to your Callback Service
If your Callback service needs variable capacity levels, you must map its _capacity_service parameter value with the name of the Capacity service that you have created.
Add Capacity
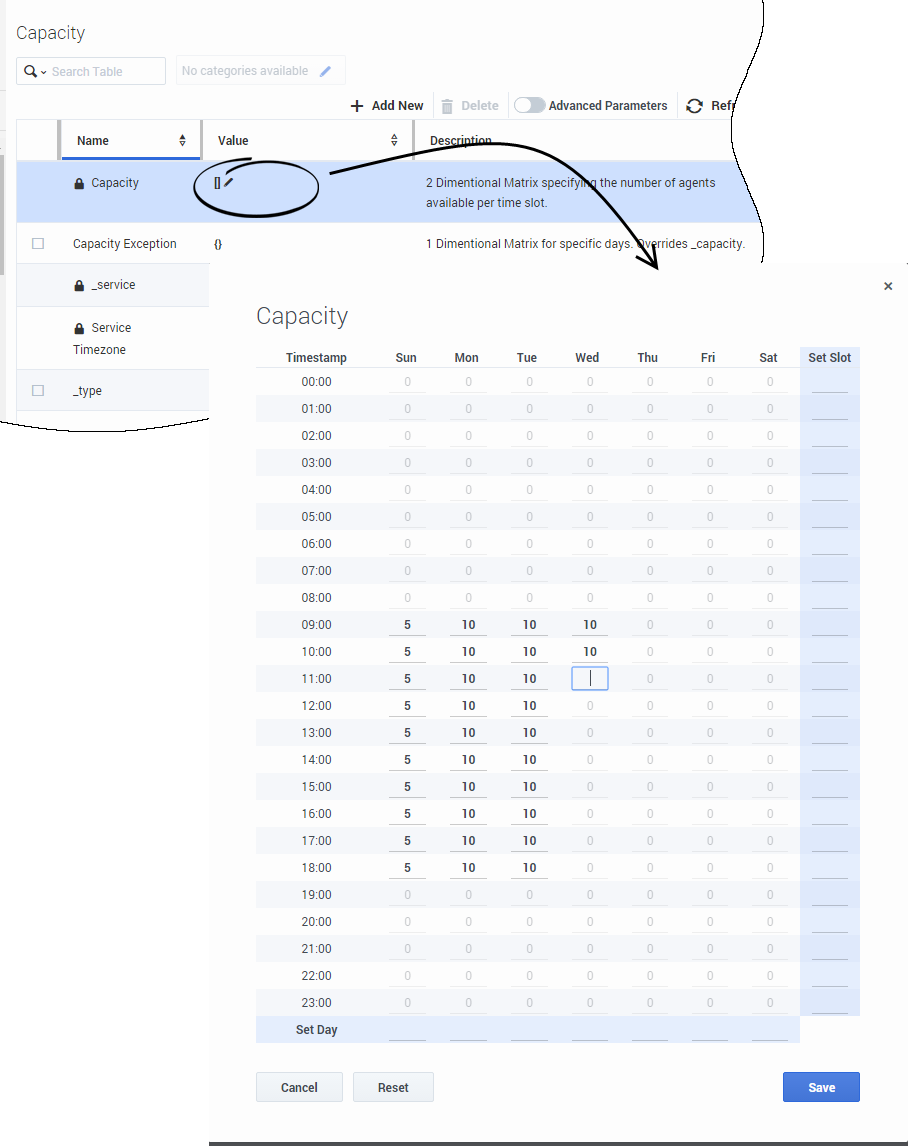
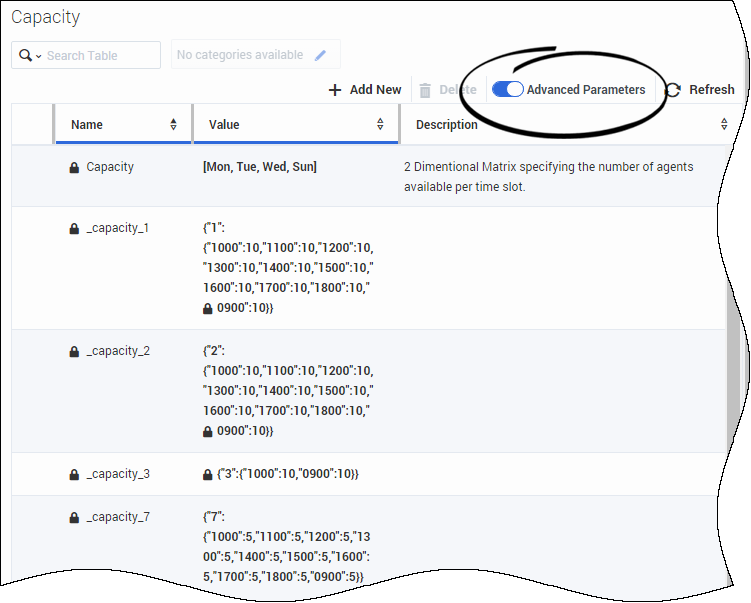
Edit the Capacity value to open the Capacity grid widget. Enter your capacity per Day or Hours, then Save.
Add Exceptions
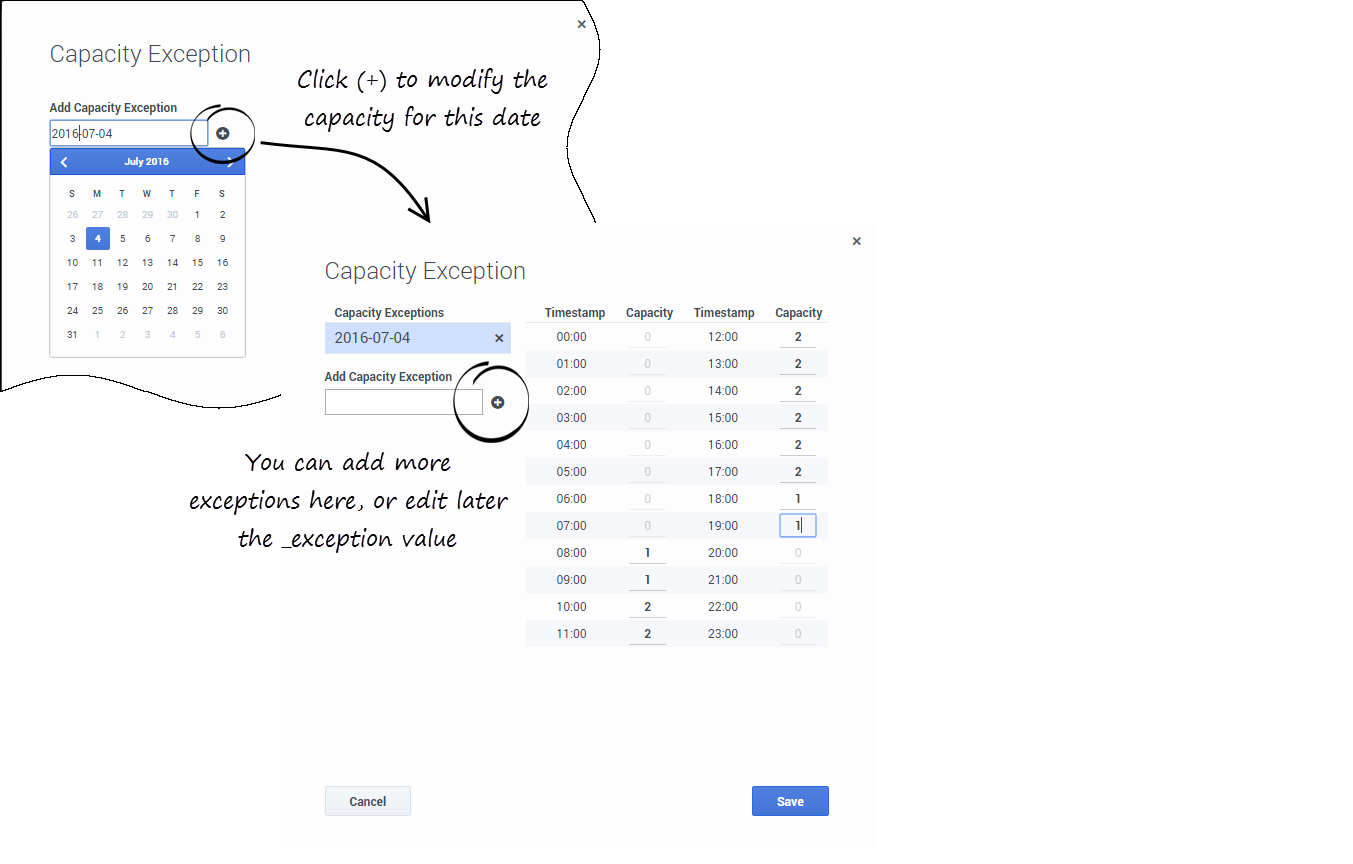
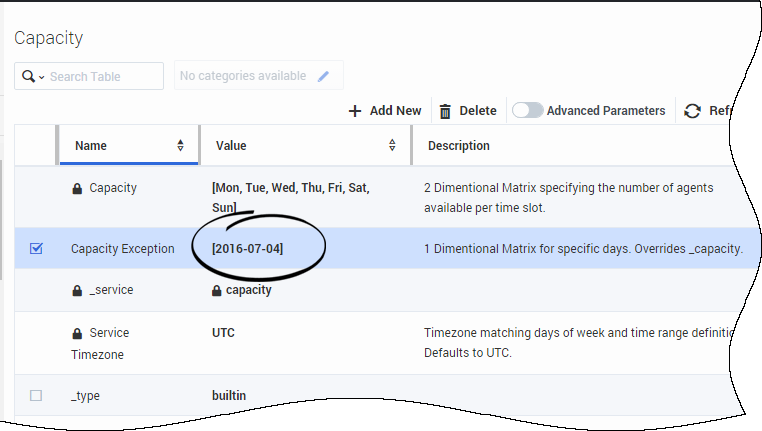
For more flexibility, you can set exceptions for the Capacity service. You can enter dates with different capacities for federal holidays, vacations, and so on.
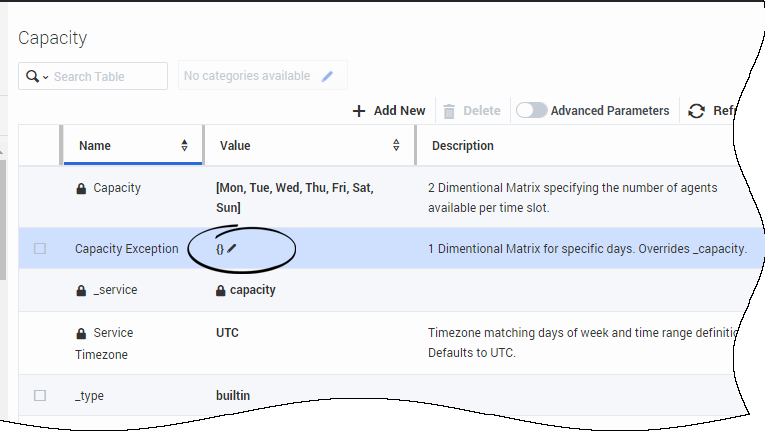
Edit the Capacity Exception value to open the interface.


