
Cassandra Security
This article describes how to tune secure access from your Co-browse Server to external Cassandra. Starting from 8.5.1, you can secure the following when using external Cassandra:
- Secure the access interfaces using authentication and authorization.
- Secure network traffic using TLS.
Securing Access Interfaces
You can secure your access interfaces based on an authentication and authorization scheme. In other words, Cassandra needs to know:
- Authentication—who is trying to access the system?
- Authorization—is the user allowed to access the system and what data can the user access?
With the default setup, anybody can access any data. To secure access interfaces from Co-browse Server to external Cassandra, you must:
- Turn on authentication and authorization in your Cassandra configuration.
- Set up a new Cassandra user to access the Co-browse keyspace.
- Specify Cassandra user settings in the Resource Access Point configuration.
Configure Cassandra to Use Authentication and Authorization
Configure Cassandra by editing <Cassandra installation directory>/conf/cassandra.yaml.
- Set the authenticator option to PasswordAuthenticator. It's set to AllowAllAuthenticator by default.
- Set the authorizer option to CassandraAuthorizer. It's set to AllowAllAuthorizer by default.
- Optionally, tune your sytem_auth keyspace replication according to the DataStax system_auth documentation. Note that the validity period for permisions caching is 2000 ms. For more information about Cassandra permissions, see the DataStax Object permissions documentation.
- Restart your Cassandra node.
Set Up a New Cassandra User
To set up a new Cassandra user, use a Cassandra client tool like dbeaver or cqlsh:
-
Start by connecting to Cassandra using the default superuser name and password, cassandra/cassandra. The following examples use dbeaver and cqlsh as examples but you can use a different Cassandra client:
-
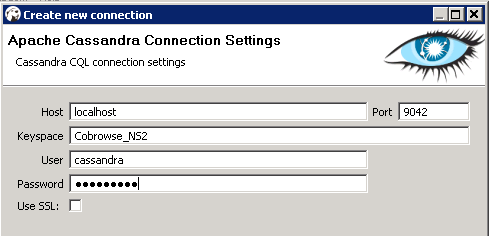
dbeaver:
Navigate to New connection > Cassandra CQL > Appache Cassandra Connection Settings. Specify the Host and Keyspace. Use your superuser login for User and Password.
-
cqlsh:
Start cqlsh using the default superuser name and password:
./cqlsh -u cassandra -p cassandra
-
-
Use the CREATE USER CQL statement to create another superuser. For example:
CREATE USER IF NOT EXISTS <new_cobrowse_user> WITH PASSWORD 'new_password' SUPERUSER
-
Use the GRANT CQL statement to grant access permisions. For example:
GRANT ALL PERMISSIONS ON <cobrowse_keyspace> TO <new_cobrowse_user>
CQL also supports the authorization statements GRANT, LIST PERMISSIONS, and REVOKE.

Deactivate Default Superuser
Optionally, you can now deactivate the default superuser cassandra:
- Login as your new superuser.
- Change the password for the cassandra user.
- Turn off the superuser status for the cassandra user.
Configure Resource Access Point
Use the login information of the superuser you created to configure the Cassandra Resource Access Point:
- Open or create a cassandraClient configuration options section.
- Set the userName and password to your superuser's login.
