Contents
Using Recorded Audio
Your application can now greet callers and offer them a simple menu. The next step is to use recorded audio, instead of TTS, to give your application a more polished presentation. In this example, you will upload recorded audio and use it in your sample application.
The video below demonstrates the full example. See below the video for step-by-step instructions.
Add an Audio Collection
Click Audio Resources in the Navigation Bar to open the list of Audio Collections.
The list shows collections of Audio Resources that are stored on your system. Each collection might have one or more audio resources associated with it.
Your next step is to create an Audio Collection and add an Audio Resource to it. You will use this audio resource in your application.
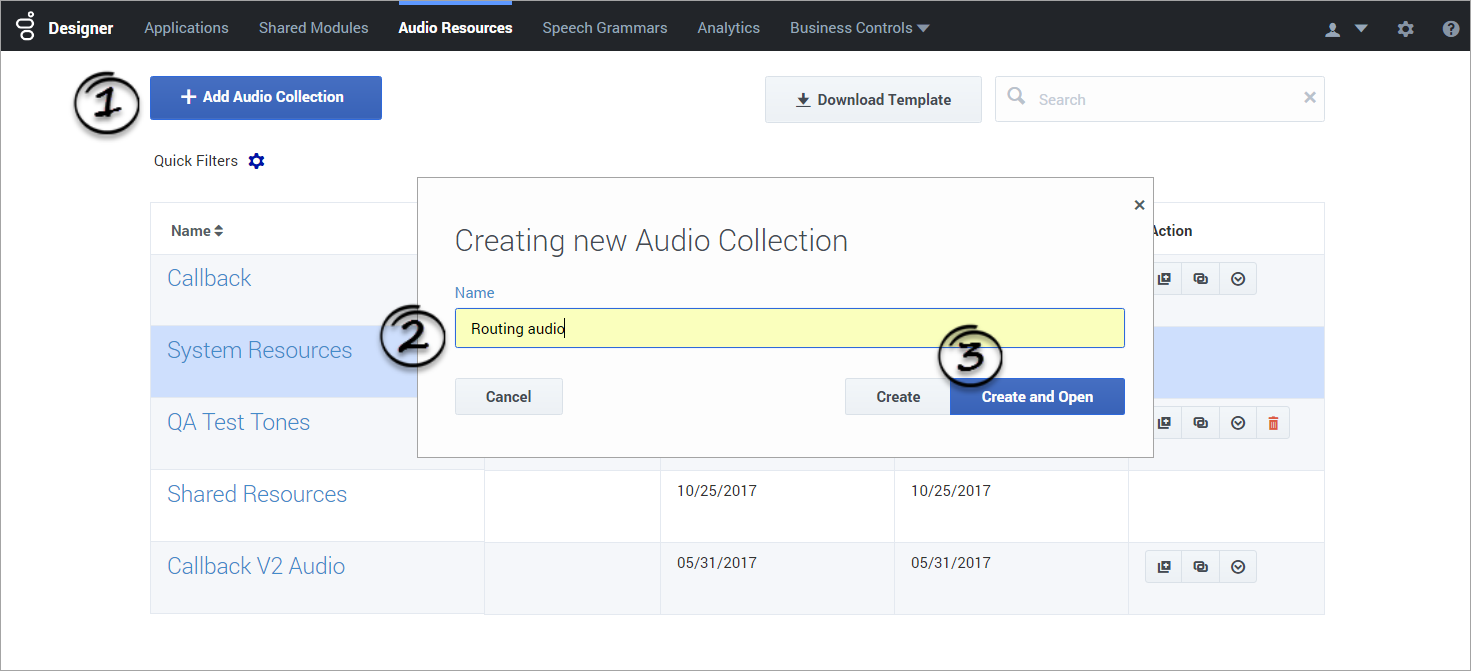
Click Add Audio Collection and enter Routing audio in the Name field. Click Create and Open.
Add an Audio Resource
Click Add Audio Resource. A pop-up window appears and asks you to name this announcement. Enter Hi in the Name field and click OK. The Hi audio resource now appears in the list.
Now that you have added an audio resource to this collection, your next step is to upload an audio file.
Upload an Audio File
Select the Hi audio resource to view its details, which appear to the right of the Audio Resources list. At the bottom of the details section, click Manage Languages .
Make sure that This announcement plays TTS only is NOT selected.
Click Add language to select the language spoken by the audio resource. For this example, select English (United States) (en-us).
Download the following sample audio file: des_hi.wav
Click the File button and select the audio file you have just downloaded. A checkmark appears when the file is uploaded successfully.
Click Save.
Publish the Audio Collection
Audio Collections must be published before their audio resources can be used in applications.
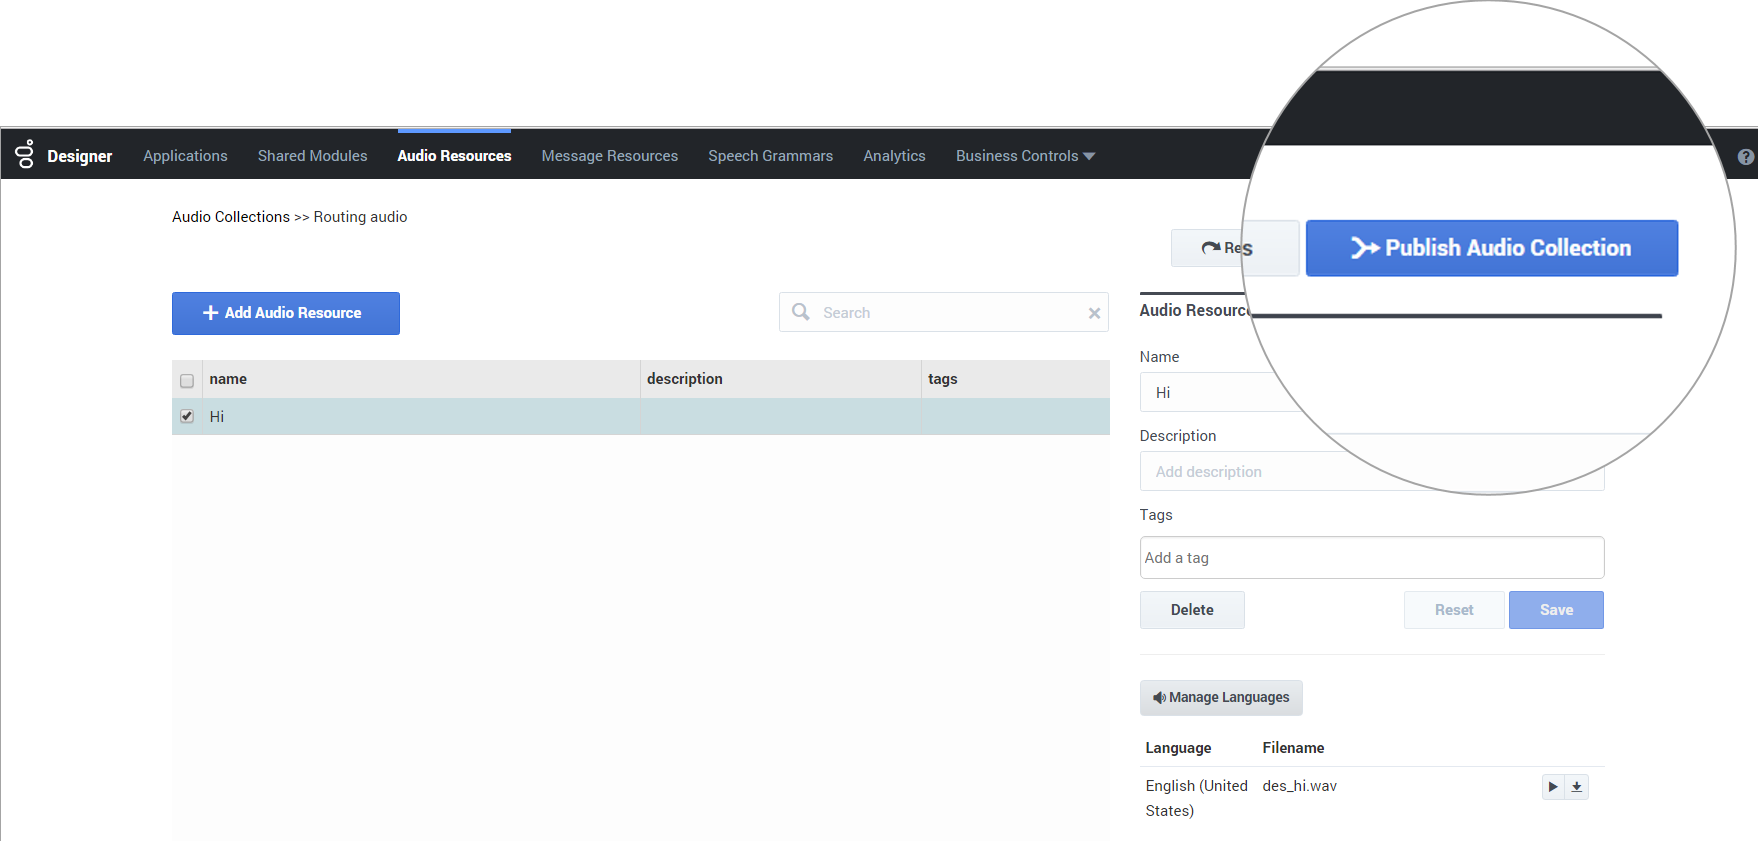
From the Audio Resources page, click Publish Audio Collection. Designer will display a message when the audio collection is successfully published.
You now have an audio resource that you can use in your application.
Add Audio to your Application
Click Applications in the Navigation Bar to return to the applications list.
Click the Routing application to open it for editing and then click Settings.
Go to the Audio tab. From the Audio Resource Collection drop-down list, select the Routing audio collection that you created in the previous step. Click OK.
Next, select the first Play Message block in your application to edit its properties.
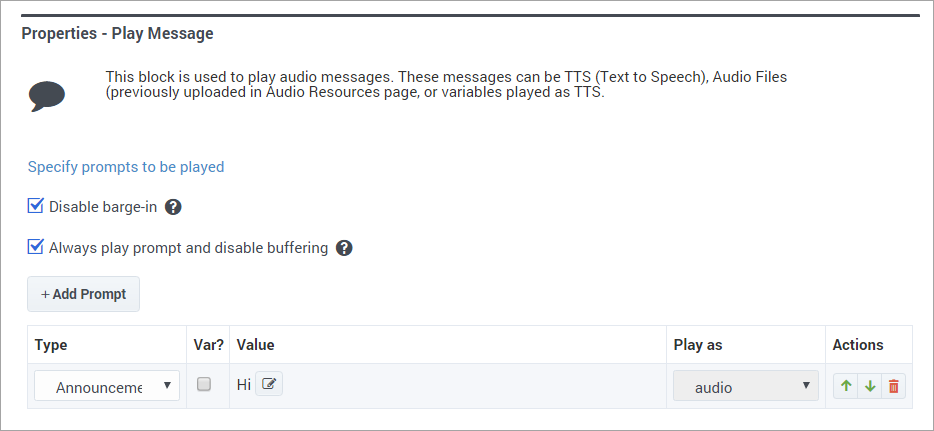
Change the prompt Type to Announcement, and then click the Value field. Go to the Routing audio tab and select the Hi announcement. Click OK.
Publish and Test
Click Publish to publish your application and save your changes.
Call your application to hear it say "Hi" with the recorded audio that you uploaded in this example.
Next steps
Congratulations, you have created your first application in Genesys Designer.
The next pages will explain application structure and configuration so you can create more applications that suit your business needs.
You can also refer to the Bonus Example page to learn more about advanced topics such as shared modules and segmentation.


