
Transport Layer Security
Also known as TLS. An industry-standard protocol for secure communications on the Internet. It is the successor of Secure Sockets Layer (SSL) 3.0.
Genesys supports the use of the TLS protocol to secure data exchange between Genesys components.
Glossary
Configuring TLS
Contents
Genesys Co-browse supports the Transport Layer Security (TLS) protocol to secure data exchanged with other Genesys components. For details about TLS, see the Genesys 8.1 Security Deployment Guide. You can configure TLS for Co-browse by completing the procedures on this page.
Configuring TLS for Genesys Servers
To configure the TLS parameters for Genesys servers like Configuration Server, Message Server, or Chat Server, see Configuring TLS Parameters in Configuration Manager.
Configuring TLS for Co-browse Server
To enable TLS support for Co-browse Server, you must:
- Have properly installed trusted certificates for the Genesys servers.
- Configure TLS options for the Co-browse Server application.
- Configure the appropriate connections between the Co-browse server application and the necessary Genesys servers through secure ports.
Configuring Trusted Stores
PEM Trusted Store
PEM stands for "Privacy Enhanced Mail", a 1993 IETF proposal for securing e-mail using public-key cryptography. That proposal defined the PEM file format for certificates as one containing a Base64-encoded X.509 certificate in specific binary representation with additional metadata headers.
PEM certificate trusted store works with CA certificate from an X.509 PEM file. It is a recommended trusted store to work on Linux systems.
Complete the steps below to work with the PEM certificate trusted store:
Start
- Configure TLS for Genesys servers to use certificates signed by CA certificate certificateCA.crt.
- Place the trusted CA certificate in PEM format on the Co-browse Server application host. To convert a certificate of another format to .pem format you can use the OpenSSL tool. For example:
- Convert a DER file (.crt .cer .der) to PEM:
- openssl x509 -inform der -in certificateCA.crt -out certificateCA.pem
- Convert a PKCS#12 file (.pfx .p12) containing a private key and certificates to PEM:
- openssl pkcs12 -in certificateCA.pfx -out certificateCA.pem -nodes
- You can add -nocerts to only output the private key or add -nokeys to only output the certificates.
- Convert a DER file (.crt .cer .der) to PEM:
- In Genesys Administrator, navigate to Provisioning > Environment > Applications and open your Co-browse Server application.
- Click the Options tab and navigate to the security section.
- Set the provider option to PEM.
- Set the trusted-ca option to the path and file name for your trusted CA in PEM format on the Co-browse Server application host.
- Click Save & Close.
End
JKS Trusted Store
A Java KeyStore (JKS) is a repository of security certificates used, for instance, in SSL/TLS encryption. The Java Development Kit provides a tool named keytool to manipulate the keystore.
Complete the steps below to work with the JKS certificate trusted store:
Start
- Configure TLS for Genesys servers to use certificates signed by CA certificate certificateCA.crt.
- Import the CA certificate to an existing Java keystore using keytool:
- Run the keytool command with option -alias set to root:
- keytool -import -trustcacerts -alias root -file certificateCa.crt -keystore /path/to/keysore/keystore.jks
- Enter the keystore password in command line prompt - for example:
- Enter keystore password: somepassword
- Run the keytool command with option -alias set to root:
- In Genesys Administrator, navigate to Provisioning > Environment > Applications and open your Co-browse Server application.
- Click the Options tab and navigate to the security section.
- Set the provider option to JKS.
- Set the trusted-ca option to the path and file name for your JKS trusted storage type on the Co-browse Server application host.
- Set the truststore-password option to the password defined for your keystore in Step 2.
- Click Save & Close.
End
MSCAPI Trusted Store
Complete the steps below to work with the MSCAPI certificate trusted store:
Start
- Configure and tune TLS for Genesys servers to use certificates signed by the same CA.
- If the Co-browse Server is running on a different host, copy the trusted CA certificate to this host.
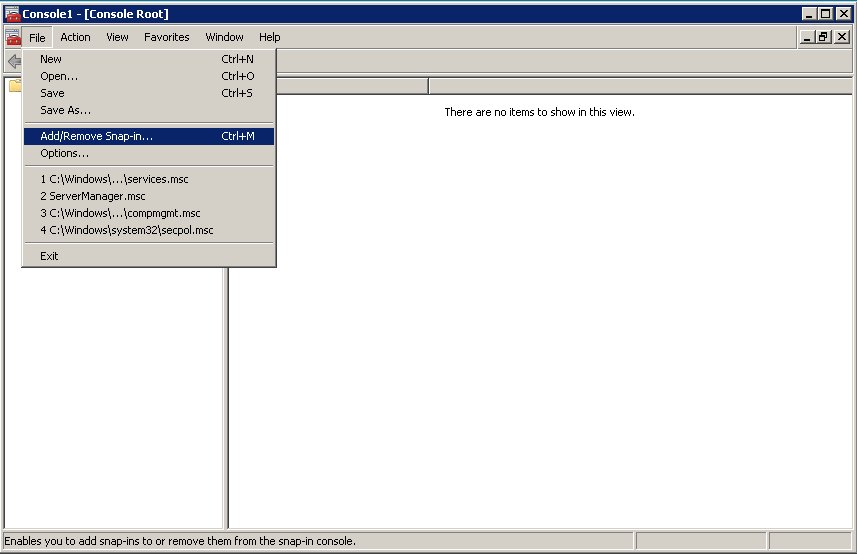
- Import the CA certificate to WCS via Certificates Snap-in on the Co-browse Server host by launching the MMC console. Enter mmc at the command line.
- Select File > Add/Remove Snap-in... from the main menu.
- Select Certificates from the list of available snap-ins and click Add.

- Select the account to manage certificates for and click Finish. It is important to place certificates under the correct Windows account. Some applications are run as services under the Local Service or System account, while others are run under user accounts. The account chosen in MMC must be the same as the account used by the application which certificates are configured for, otherwise the application will not be able to access this WCS storage.
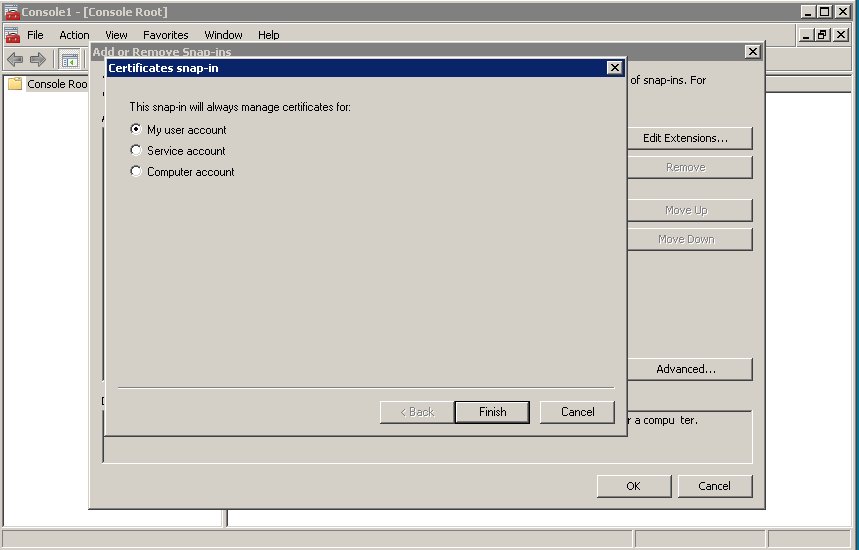
- Click OK.
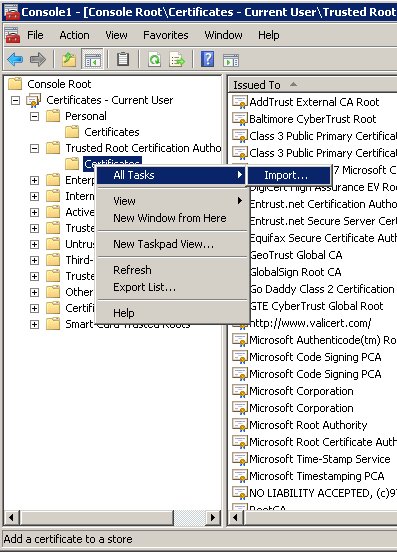
- Import a certificate. Right-click the "Trusted Root Certification Authorities/Certificates" folder and choose All Tasks > Import... from the context menu. Follow the steps presented by the Certificate Import Wizard, and once finished the imported certificate appears in the certificates list.
- In Genesys Administrator, navigate to Provisioning > Environment > Applications and open your Co-browse Server application.
- Click the Options tab and navigate to the security section.
- Set the provider option to MSCAP.
- Click Save & Close.


End
Configuring TLS Options
- For Configuration Server, configure TLS in the setenv.bat/setenv.sh file located in the server directory.
- For other Genesys servers, configure TLS in the security section of the Co-browse Server (8.5.000), Co-browse Node (8.5.001+), or Co-browse Cluster (8.5.003+) application object.
- If you use Solution Control Server, you cannot configure the security section of the Co-browse Cluster application object and must configure the security section of the Co-browse Node application object.
Genesys Co-browse Server includes the following TLS-related configuration options:
| Option | Default Value | Mandatory | Changes Take Effect | Description |
|---|---|---|---|---|
| provider | none | no | after restart | Type of trusted storage
Valid values: MSCAPI, PEM or JKS If empty, TLS support is disabled. |
| trusted-ca | none | no | after restart | Specifies the name of the trusted store file which holds the public certificate to verify the server.
Applicable for PEM and JKS trusted storage types only. Valid values: valid file name (including path) |
| truststore-password | none | no | after restart | Password for the JKS trusted storage.
Valid values: any string |
See Configuring Trusted Stores above for details about configuration for a specific type of store (PEM, JKS, MSCAPI).
Configuring TLS Connections
In Co-browse Server 8.5.0, the procedure for configuring TLS connections changed. You must configure TLS-related connections between the Co-browse Server application and the Genesys server in the following way:
- For Configuration Server, configure connection in setenv.bat/setenv.sh located in the server directory.
- For connections with other Genesys servers, configure Connections of the Co-browse Server (8.5.000) or Co-browse Cluster (8.5.001+) application through secure ports.