
Install Genesys Co-browse Server
Contents
- Starting in 8.5.0, Embedded Cassandra mode is deprecated in Genesys Co-browse; support for this mode will be discontinued in 9.0.
- Genesys strongly recommends no more than one Cassandra instance on the same machine due to performance. If you intend to use a Cassandra instance embedded into Co-browse Server, you should not have a CASSANDRA_HOME environment variable to avoid conflict between embedded and external CASSANDRA_HOME variables.
Creating the Co-browse Server Application Object in Genesys Administrator
Overview
Co-browse 8.5.001+ introduces a new cluster configuration, which includes cluster and node Application objects. In the steps below, you create multiple Co-browse Server Application nodes, each with unique configuration, and unite them under a common configuration in the Cluster Application object:
- Importing the Application Templates
- Creating the Co-browse Cluster Application
- Creating the Co-browse Node Application
Importing the Application Templates
To support this new configuration, you must first import two application templates, one for the node and one for the cluster.
Start
- Open Genesys Administrator and navigate to PROVISIONING > Environment > Application Templates.
- In the Create menu of the Tasks panel, click the Upload Template link.
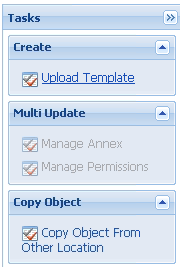 Upload Template link in the Tasks panel
 - When the dialog box appears, Click Add to choose the application template (APD) file to import.
- Choose the Co-browse_Cluster_850.apd file in the templates directory of your installation CD. The New Application Template panel opens.
- Click Save & Close.
- Complete the same import steps for the Node Application Template by importing the Co-browse_Node_850.apd file in the templates directory of your installation CD.

End
Creating the Co-browse Cluster Application
Prerequisites
- You completed Importing the Application Templates.
Start
- Open Genesys Administrator and navigate to PROVISIONING > Environment > Applications.
- In the Create menu of the Tasks panel, click the Create New Application link.
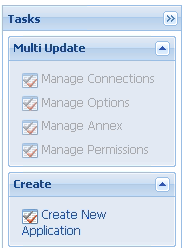 Create New Application link.
 - In the Select Application Template panel, click Browse for Template and select the Co-browse Cluster template you previously imported. Click OK.
- The template appears in the Select Application Template panel. Click Next.
- In the Select Metadata File panel, click Browse and select the Co-browse_Cluster_850.xml file. Click Open.
- The metadata file appears in the Select Metadata File panel. Click Next.
- In Specify Application parameters:
- Enter a name for your application—for example, Co-browse_Cluster.
- Enable the State.
- Select the host of the Co-browse Server. Co-browse does not actually use this value for the Cluster Application, so you can specify any host.
- Click Create.
- The Results panel opens. Enable Open the Application details form after clicking Finish and click Finish. The Co-browse Cluster Application form opens to the Configuration tab.
- If you use an external Cassandra cluster, add connections to the external Cassandra Resource Access Points (RAPs). For each RAP connection, set the ID to default.
- Create any necessary connections to other Genesys servers. For example:
- Primary Configuration Server
- Primary Message Server
- Chat Server(s) or Chat Application Cluster
- In the Server Info section, add the Default Listening Port. Co-browse does not use this value for the Cluster Application, so you can specify any port.
- Make sure the Working Directory and Command Line fields are set to . (period).
- In the Options tab, set the following configuration options:
ImportantApplication Node configuration has priority over Application Cluster Configuration. If you configure an option in both the Application Node and Application Cluster objects with different values, Co-browse uses the Application Node value.
- In the cassandraEmbedded section: If you use an external Cassandra cluster, set enabled to false. Genesys recommends using an external Cassandra cluster. Support for embedded Cassandra will be discontinued in 9.0.
- In the cassandraKeyspace section: Set replicationStrategyParams using the following format:
'<Data Center name>':<Co-browse Nodes amount>
For example: 'OperationalDC':3
- In the cluster section: Set the url option to the HTTP(S) Co-browse load balancer. For example:
https://<LB_host>:<LB_port>/cobrowse
- Set additional options according to your needs. See Configuration Options for details.
- Click Save & Close. The Confirm dialog displays the following message:
The host and/or port(s) of the application will be changed. Do you want to continue?
Click Yes.

End
Creating the Co-browse Node Application
Prerequisites
- You completed Importing the Application Templates.
- You completed Creating the Co-browse Cluster Application.
Complete the following steps for each Co-browse Node Application in your cluster.
Start
- Open Genesys Administrator and navigate to PROVISIONING > Environment > Hosts.
- Click New... and create the Host object where the Co-browse Node will run.
- Navigate to PROVISIONING > Environment > Applications.
In the Create menu of the Tasks panel, click Create New Application. Create New Application link. - In the Select Application Template panel, click Browse for Template and select the Co-browse Node template you previously imported. Click OK.
- The template appears in the Select Application Template panel. Click Next.
- In the Select Metadata file panel, click Browse and select the Co-browse_Node_850.xml file. Click Open.
- The metadata file appears in the Select Metadata File panel. Click Next.
- In Specify Application Parameters:
- Enter a name for your application—for instance, Co-browse_Node.
- Enable the State.
- Select the Host you created in Step 2. This is the host where the Co-browse Server will reside.
- Click Create.
- The Results panel opens
Enable Open the Application details form after clicking 'Finish' and click Finish. The Co-browse Node Application form opens to the Configuration tab. - Create a connection to the Co-browse Cluster Application you previously created and set the ID to default.
- In the Server Info section, add the Default Listening Port. Set Connection Protocol to http and Listening Mode to unsecured.
- If you intend to use https, add the https port. Set Connection Protocol to https and Listening Mode to secured.
- Make sure the Working Directory and Command Line fields are set to . (period). Co-browse automatically populates these fields during installation.
- In the Options tab, set the following configuration options:
ImportantApplication Node configuration has priority over Application Cluster Configuration. If you configure an option in both the Application Node and Application Cluster objects with different values, Co-browse uses the Application Node value.
- In the cassandraEmbedded section: If you use an external Cassandra cluster, leave all values at their defaults. Otherwise, specify the necessary values for your configuration.
- Set any other options according to your needs. See Configuration Options for details.
- Click Save & Close. The Confirm dialog displays the following message:
The host and/or port(s) of the application will be changed. Do you want to continue?
Click Yes.
End
Importing the Application Template for the Co-browse Server
Start
- Open Genesys Administrator and navigate to PROVISIONING > Environment > Application Templates.
- In the Create menu of the Tasks panel, click the Upload Template link. Upload Template link in the Tasks panel
- Click Add in the Click 'Add' and choose application template (APD) file to import dialog box.
- Browse to the Co-browse_Server_850.apd file, available in the templates directory of your installation CD. The New Application Template panel opens.
- Click Save & Close.
End
Creating the Co-browse Server Application
Prerequisites:
- You must have a webapi listening port configured on your Chat Server Application. For details, refer to the eServices 8.1 Deployment Guide.
- You completed Importing the Application Template for the Co-browse Server.
Start
- Open Genesys Administrator and navigate to PROVISIONING > Environment > Applications.
- In the Create menu of the Tasks panel, click the Create New Application link. Create New Application link.
- In the Select Application Template panel, click Browse for Template and select the Co-browse Server template that you imported in Importing the Application Template for the Co-browse Server. Click OK.
- The template is added to the Select Application Template panel. Click Next.
- In the Select Metadata file panel, click Browse and select the Co-browse_Server_850.xml file. Click Open.
- The metadata file is added to the Select Metadata file panel. Click Next.
- In Specify Application parameters:
- Enter a Name for your application—for instance, Co-browse_Server.
- Enable the State.
- Select the Host on which Co-browse Server will reside.
- Click Create.
- The Results panel opens.
- Enable Opens the Application details form after clicking 'Finish' and click Finish. The Co-browse Server application form opens to the Configuration tab.
- Add a connection to Chat Server.
- Click Add in the Connections section.
- Select the Chat Server and click OK.
- Edit the connection and set ID to the webapi listening port on your Chat Server.
 Chat Server connection
 - Click OK.
- If your Host is not defined, click the lookup icon to browse to the hostname of your application.
- Add the default port.
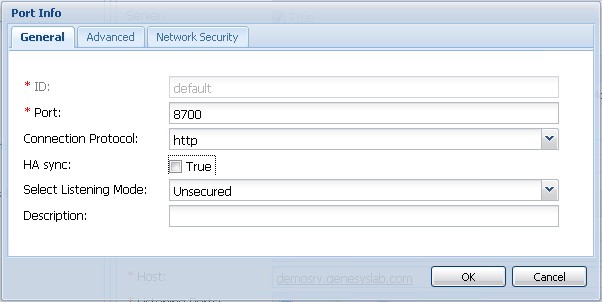
- Click Add in the Listening Ports section. The Port Info dialog box opens.
- Enter the application's Port. For instance, 8700. This must be a Jetty port configured in the Jetty configuration file.
- Mandatory: Enter http for the Connection Protocol field. This connection protocol setting will be used by IWS to connect to the Co-browse Server.
- Optional: Enter a description.
 The default http listening port.
 - Click OK. The HTTP port with the default identifier appears in the list of Listening Ports.
- Add the secure port.
- Click Add in the Listening Ports section. The Port Info dialog box opens.
- Enter https for the ID.
- Enter the application's secure Port. For instance, 8743. This must be a Jetty port configured in the Jetty configuration file.
- Mandatory: Enter https for the Connection Protocol field.
- Mandatory: Select the Secured for the Select Listening Mode field.
- Optional: Enter a description.
 The https listening port.
 - Click OK. The HTTPS port with the https identifier appears in the list of Listening Ports.
- Ensure the Working Directory and Command Line fields contain "." (period). They will be automatically populated when the Co-browse Server is installed.
- Click Save & Close. The Confirm dialog displays the following message: The host and/or port(s) of the application will be changed. Do you want to continue? Click Yes.


End
Next Steps
- You can now install the Co-browse Server as described in Installing the Co-browse Server.
Installing the Co-browse Server
With basic Configuration Server details in place, you can now complete the installation process.
Prerequisites: You completed Creating the Co-browse Server Application Object in Genesys Administrator.
Start
- In your installation package, locate and run the setup application for your platform as specified below:
- Linux: install.sh
- Windows: setup.exe
- The Install Shield opens to a welcome screen.
- Click Next. The Connection Parameters to the Configuration Server screen appears.
- Under Host, specify the host name and port number of your Configuration Server. This value should be the same as the main listening port in the Server Info tab of your Configuration Server.
- Under User, enter the user name and password to log in to Configuration Server.
- Click Next. The Select Application screen appears.
- Select the Co-browse Server Application you are installing. The Application Properties area shows the Type, Host, Working Directory, Command Line executable, and Command Line Arguments information previously entered in the Server Info and Start Info tabs of the selected Application object.
- Click Next. The Choose Destination Location screen appears.
- Under Destination Folder, keep the default value or click browse to set the installation location.
- Click Next. The Backup Configuration Server Parameters screen appears.
- Under Host, specify the host name and the port number where the Backup Configuration Server is running.
- Click Next. The Ready to Install screen appears.
- Click Install. When The Genesys Installation Wizard finishes installing Co-browse Server, the Installation Complete screen appears.
- Click Finish to complete your installation of Co-browse Server.
End
Next Steps
- Complete the configuration of the Co-browse Server Application, as described in Configuring the Co-browse Server.
Configuring the Co-browse Server
Complete the steps below to configure the Co-browse Server application in Genesys Administrator. This procedure only covers a few of the mandatory options. Most options can be left at their default values.
Prerequisites: Creating the Co-browse Server Application.
Start
- Open Genesys Administrator and navigate to PROVISIONING > Environment > Applications.
- If you are installing version 8.5.000, select the Co-browse Server Application that you previously created. If you are installing 8.5.001+, select the Co-browse Cluster Application you previously created.
- In the Options tab, locate the session section and update the following options:
- domRetrictionsURL—a URL that points to the XML file that contains DOM restrictions. By default, all Submit buttons are disabled for the agent. For information about customizing this XML file, see DOM Restrictions
- If you deploy Co-browse Server to an environment where the Internet is accessed using a forward proxy (for example, DMZ or local intranet), configure the options in the forward-proxy section.
- If your configuration uses Genesys Chat, update the following option in the chat section:
- queueKey—specifies the endpoint configured in Chat Server. Use the format tenantid:endpointname.
- If you are installing 8.5.001+, Save & Close your Co-browse Cluster Application and open the Co-browse Node Application that you previously created.
- Configure the options in the log section. These options are standard Genesys log options. For details, refer to the Management Framework 8.1 Configuration Options Reference Manual.
- If you use Genesys Workspace Web Edition, configure the serverUrl option in the cluster secion.
- Click Save & Close.
End
Next Steps