
UI Customization Examples
Contents
This is a collection of UI customization examples. Although these examples do not cover every possible customization case, they should give you a sample of what can be achieved and how to begin.
Example: Customizing Live Chat and Co-browsing Buttons
Customization type: CSS Based
Prerequisites
You must have basic knowledge of CSS and HTML.
Start of Procedure
-
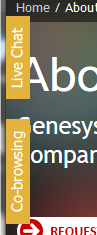
In Firefox, open the page instrumented with the Co-browse JavaScript application. Live Chat and Co-browsing buttons should appear:
-
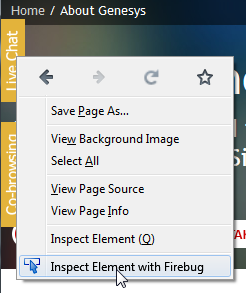
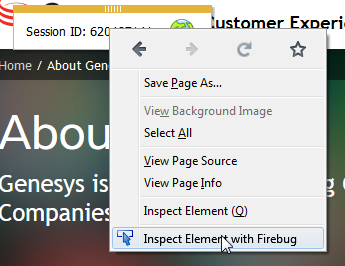
Right click the Live Chat buttons and click Inspect Element with Firebug to open the Firebug tool.
-
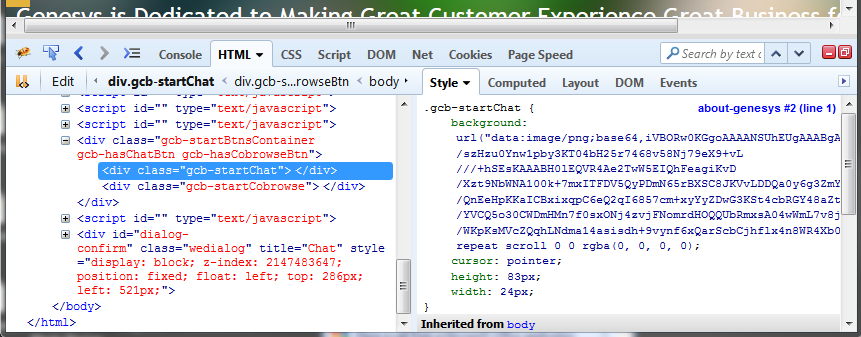
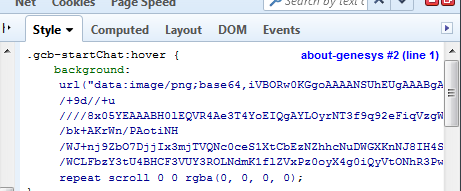
In Firebug, you can see the CSS rules responsible for styling the button:
-
Also check :hover rules to see if there are any rules applied to the button when the mouse cursor is over it. To do this, enable the :hover modifier in Firebug:
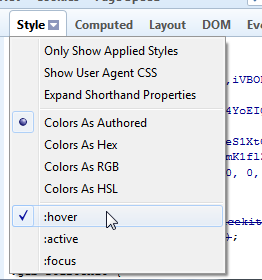
You can see that there is an additional :hover rule for the button:
-
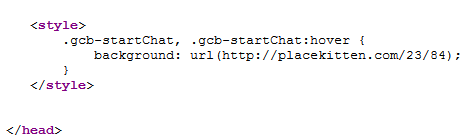
Base on the rules above, you can prepare your own rules that override the defaults. In this example, we will prepare a custom image with a similar size to the default button and override the background. We will use a public service to generate an image of a kitten via an http request.
Here is our CSS:
/* 1. copy-paste the selector of the element to override */ .gcb-startChat, .gcb-startChat:hover { /* 2. override some rules: */ background: url(http://placekitten.com/23/84); } -
Now we add our CSS to the <head> section of our site. The way this is done will depend on the technology your website uses. We want to add code like this to the webpage:
-
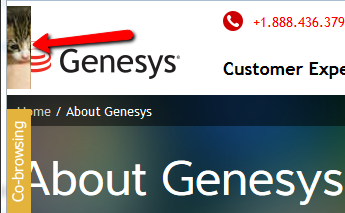
Reload the page. Now, the Live Chat button is replaced with our new image:


End of Procedure
Example: Customizing the Toolbar Position
Customization Type: JavaScript Based
In this example, we will customize the starting position of the Co-browse toolbar:

Prerequisites
- Experience with JavaScript, jQuery, and browser developer tools such as Firebug.
- This example uses the the jQuery library to work with the DOM and assumes that jQuery is available on the page.
Start of Procedure
-
Obtain the Co-browse API. See Accessing the Co-browse and Chat APIs for more information about obtaining the Co-browse API. In this example, we use the single-function mechanism.
var _genesys = { cobrowse: { onReady: function(cobrowseAPI) { // ... } } } -
Use the Co-browse API to subscribe to the onSessionSarted Co-browse event.
cobrowseAPI.onSessionStarted.add(function() { // ... });TipYou can subscribe to the readiness of the UI using the onReady Callback. -
Use Firebug to determine which element to customize:
- Start a Co-browse session.
-
Right click the Co-browse toolbar and click Inspect Element with Firebug to open the Firebug tool.
-
In Firebug, you can see that the element selected for inspection is not the toolbar itself but one of its sub-elements.
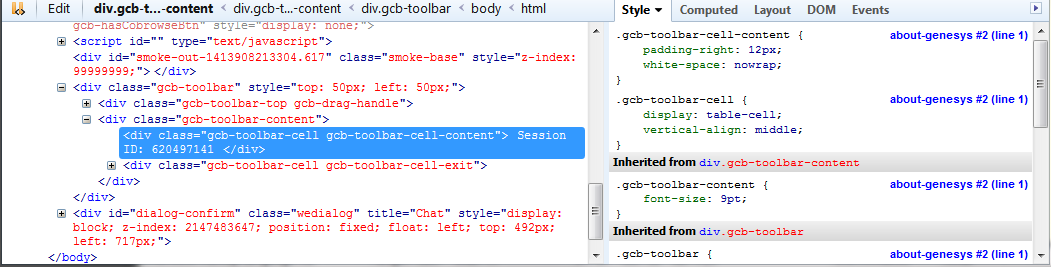
You can also see from the Styles tab that position is not set for this element.
-
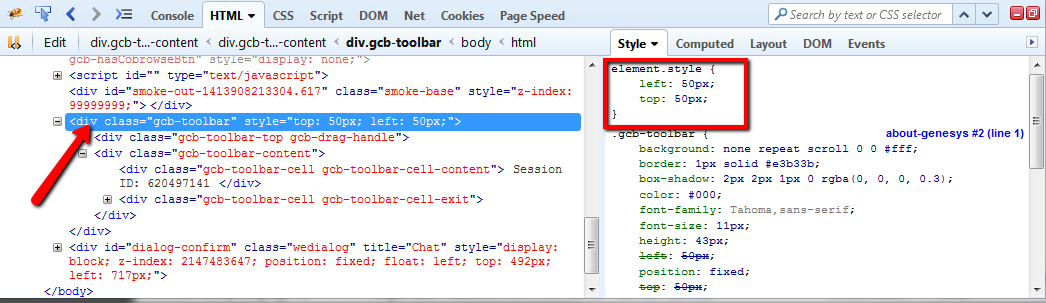
You need to find the element whose position you want to change. From the DOM tree in Firebug you can see that this is the .gcb-toolbar.
-
Now, we will use jQuery to override the position of the toolbar. We will set the starting position to 100 pixels from the top edge and 300 pixels from the left edge.
jQuery('.gcb-toolbar').css({ top: 100, left: 300 }); -
Putting it all together, we have the following:
// 1. Get the API
var _genesys = {
    cobrowse: {
        onReady: function(cobrowseAPI) {

            // 2. Use the API to subscribe on “session started” event
            cobrowseAPI.onSessionStarted.add(function() {

                // 3. Use jQuery to get the toolbar and reposition it
                jQuery('.gcb-toolbar').css({
                    top: 100,
                    left: 300
                });

            });

        }
    }
};


End of Procedure
.gcb-toolbar {
    top: 100px !important;
    left: 300px !important;
}
This solution is less ideal because you would have to use the !important modifier to override the inline styles of the element and this modifier would make the toolbar non-draggable.