Using the Genesys Softphone
Contents
This section describes how to use the Genesys Softphone.
Starting the Genesys Softphone
You can start the Genesys Softphone in one of two ways:
- Double-click the GenesysSoftphone.exe file found in the <Genesys Softphone Installation Directory>/Genesys Softphone/GenesysSoftphone/ directory
- Execute the following command:
C:<Genesys Softphone Installation Directory>Genesys Softphone\GenesysSoftphone\GenesysSoftphone.exe C:<Genesys Softphone Installation Directory>Genesys Softphone\GenesysSoftphone\\ConfigFileName.configTo open the Genesys Softphone UI, right-click the Genesys Softphone (file:Spicon.png) icon from the Icon Tray:
file: Softphone_icon.png
and select Open.
Activating and Registering the User
When the Genesys Softphone first starts, it reads the user's information from the Softphone.cfg file, and automatically registers the user.
To verify that the user is registered:
- After starting the Genesys Softphone, right-click on the softphone icon from the Icon Tray and hover over the Connectivity menu. You can register or un-register a connection by clicking and toggling the check marks.
The notification area shows that the Softphone is active and ready to take calls.

Selecting the Input and Output Devices
The Genesys Softphone configures the input and output devices during start-up when it reads the list of devices from the Softphone.config file. However, if required, the softphone user can change the brand of device used while the Genesys Softphone is running.
To select an input or output device:
- In the application, click on the devices tab.
file:Softphone_GUI_devices_tab.png - Select the appropriate microphone from the Input Device drop-down list.
- Select the appropriate speaker from the Output Device drop-down list.
Viewing the Softphone Users and Status
Each Genesys Softphone instance can have up to six SIP user accounts configured.
To view the number of users configured and their statuses:
- Right-click the softphone icon, and click Open. The Genesys Softphone window displays. Click on the status tab.
file:Softphone_GUI_status_tab.png
Making and Receiving Calls
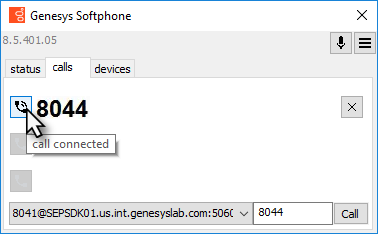
You can make and receive calls from the calls tab.
From this tab, you can perform the following operations:
- Answer an incoming call—click on the button of an alerting call to answer. If you were on another call, that call will be placed on hold.
- Hold a call—when you switch to another call, the currently active call is placed on hold.
- Retrieve a call—click on the the line button of a call on hold to retrieve that call.
- Hangup a call—click on the hangup button to terminate a call. You can terminate calls that are on hold.
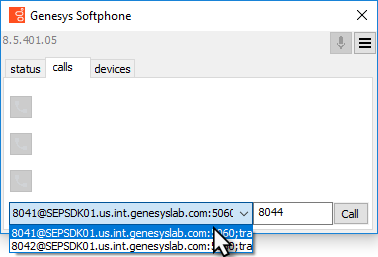
- Dial and make a call—you can make a call by selecting an originating account (connection) from the connections combo box, entering a destination number, and clicking Call. Making a new call while another call is active places the existing call on hold.
Muting the Microphone
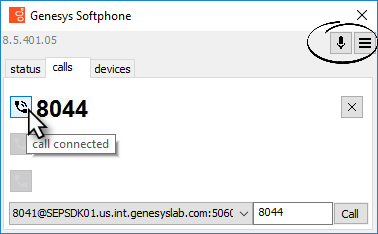
The microphone button shows the current mute status, either muted or un-muted. Clicking the microphone button changes the status.
Mute/un-mute functionality works on the application level and not the system level:
- The mute button is only available when there is an active call.
- Muting the microphone in the Softphone is done on the session level. The mute status does not depend on the selected devices nor on device presence and status. A session may be muted even if a microphone is not plugged in.
You may also mute/un-mute the microphone from the tray icon menu. To mute/un-mute the input device:
- Right-click on the Softphone icon, and click Mute.
- From the same menu, click Un-mute un-mute the input device.


