Choose your deployment
Choose one of the deployment options in the following tabs.
Important
- Some releases of Workspace include Workspace language packs (localized User Interface and Help). These procedures include information about how to install language packs either as part of the Workspace deployment or after you have deployed Workspace.
- Genesys recommends that you always install the release of Workspace for which the language pack was developed rather than installing a language pack on a previously deployed release of Workspace. For example, you should not install an 8.5.1 language pack on top of an 8.5.0 release of Workspace; doing so might result in some UI text being displayed in English or some UI elements being incorrectly labelled.
- If you are not deploying from the Workspace International CD/DVD, you must manually add Language Packs to your deployment package.
Watch video: How to Deploy Languages in Workspace Desktop Edition (International) 8.5.1:
Deploying the ClickOnce Application on your web server
Procedures
1. Install the deployment package
Perform the Procedure: Installing Workspace Deployment Package on the Windows operating system, which guides you through the steps for installing Workspace on your Windows web server from the Workspace CD/DVD.
[+] Procedure: Installing Workspace Deployment Package on the Windows operating system
Purpose:
To install the deployment files for Workspace on the Windows web server.
Tip
After running one of the Windows installers, inspect the directory tree of your system to make sure that the files have been installed in the location that you intended.
Prerequisites
- Have Administrative rights to the web server
- Framework .NET 4.5 installed
Start
- On your desktop, open the Workspace Desktop Edition CD/DVD or the Workspace Desktop Edition IP and double-click the Setup.exe file.
You might be asked to reboot your system to delete or rename certain system files before the Installation Wizard runs.
The Genesys Installation Wizard launches and the Welcome panel is displayed.
- On the Welcome panel, do one of the following:
- Click Next to begin the installation procedure.
- Click Cancel to exit the Genesys Installation Wizard.
- Click About to open the Workspace Desktop Edition ReadMe file in your default browser.
If you clicked Next, the Genesys License Agreement panel is displayed.
- On the Genesys License Agreement panel, read the DEVELOPER SOFTWARE LICENSE AGREEMENT.
If you accept the DEVELOPER SOFTWARE LICENSE AGREEMENT, check I accept Genesys License Agreement; if you do not accept the DEVELOPER SOFTWARE LICENSE AGREEMENT, click Cancel.
If you accepted the DEVELOPER SOFTWARE LICENSE AGREEMENT, do one of the following:
- Click Next to continue the installation procedure.
- Click Back to return to the Welcome panel.
- Click Cancel to exit the Genesys Installation Wizard.
If you clicked Next, the Select Options panel is displayed.
- On the Select Options panel, do one of the following:
- Choose Prepare a ClickOnce package, and click Next.
- Click Back to return to the Welcome panel.
- Click Cancel to exit the Genesys Installation Wizard.
For more information about installation options, see the Table - Workspace Install Mode Deployment Packages.
If you clicked Next, the Choose Destination Location panel is displayed (see Figure - Choose Destination Location panel of the Genesys Installation Wizard) unless you are installing from the International DVD.
- (Optional) If you are installing from the International DVD, the Language Pack Selection panel is displayed.
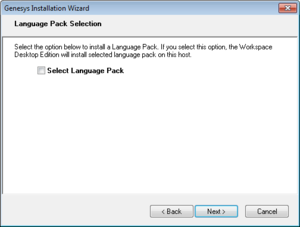
Language Pack Selection panel of the Genesys Installation Wizard
Select Select Language Pack to display the list of available language packs.

Adding and Removing languages by using the Language Pack Selection panel of the Genesys Installation Wizard
To select a language for installation, select it in the left hand box then click Add. The language is moved to the right hand box. To de-select a language for installation, select it and click Remove. The language is moved back to the left hand box and will not be installed. After you have added to the right hand box the languages that you want to install, do one of the following:
- Click Next to continue the installation procedure.
- Click Back to return to the Select Options panel.
- Click Cancel to exit the Genesys Installation Wizard.
- On the Choose Destination Location panel, specify the location on your web server in which Workspace is to be installed by doing one of the following:
- Type a location in the Destination Folder text box.
- Click Default to reset the location to the default location.
- Click Browse to navigate to a destination folder.

Choose Destination Location panel of the Genesys Installation Wizard
- With the destination folder specified, do one of the following:
- Click Next.
- Click Back to return to the Select Options panel.
- Click Cancel to exit the Genesys Installation Wizard.
If you clicked Next, the Ready to Install panel is displayed.
- On the Ready to Install panel, do one of the following:
- Click Install to install Workspace on your web server.
- Click Back to return to the Choose Destination Location panel.
- Click Cancel to exit the Genesys Installation Wizard.
If you clicked Next, Workspace is installed in the location that you specified. When installation is complete, the Installation Complete panel is displayed.
The Figure - Workspace content installed on the web-server host or workstation shows the files that are installed by the Prepare a ClickOnce package option (for more information about installation options, see the Table - Workspace Install Mode Deployment Packages).
- The Workspace Desktop Edition folder contains the Interaction Workspace application files.
- The WorkspaceDeploymentManager folder contains the application files required for deployment, including the Deployment Manager application: InteractionWorkspaceDesktop.exe. This folder contains the following subfolder:
- Click Finish to exit the Genesys Installation Wizard.
2. Install the optional SIP endpoint and plugins
[+] (optional) Procedure: Installing the Workspace SIP Endpoint
[Modified: 8.5.109.16, 8.5.114.08]
The Workspace SIP Endpoint is an optional plug-in or standalone application for Workspace. It is available as a separate IP that you install from a separate CD/DVD. You can install it in one of two modes, as a plugin that runs with Workspace Desktop Edition on the agent workstation, or as a standalone application that connects to Workspace running in a virtualized environment.
If you intend to create a ClickOnce package to install Workspace SIP Endpoint, install the Workspace SIP Endpoint after you install the Workspace application on your server, but before you run the Workspace Deployment Manager.
If you deploy Workspace SIP Endpoint as part of a ClickOnce deployment, the behavior of the ClickOnce download depends on the privileges that are assigned to the agent who is logging in. If the agent is granted the privilege to execute a local Workspace SIP Endpoint, the following files are downloaded to the agent workstation:
- The SIP Endpoint Communication plug-in (part of Workspace runtime)
- The Workspace SIP Endpoint executable and associated assemblies.
Installing Workspace SIP Endpoint as a Workspace Desktop Edition plugin
Use the following procedure to install Workspace SIP Endpoint in environments where the Workspace application and Workspace SIP Endpoint run on the same workstation. Use the Installing the Standalone Workspace SIP Endpoint when you are running Workspace in a virtualized environment.
Procedure
Installing the Workspace SIP Endpoint as a Workspace Desktop Edition plugin
Purpose: To install the Workspace SIP Endpoint on your web server, an agent workstation, or a development workstation as a plugin.
Prerequisites
- .NET Framework 4.5
- The following Microsoft redistributable package(s) is/are required to be installed on the workstation where Workspace SIP Endpoint will execute. They are installed by the Installation Package if they are not already present on the target workstation, but if you are deploying Workspace and Workspace SIP Endpoint by using ClickOnce, you must plan the installation of the following packages on those workstations prior to enabling the ClickOnce deployment:
- For 8.5.114.xx and higher
- For 8.5.104.xx to 8.5.113.xx:
- 8.5.103.xx and lower:
- Install the Workspace application by using one of the following procedures:
Start
- On your desktop, open the Workspace SIP Endpoint disc or the Workspace SIP Endpoint IP and double-click the Setup.exe file.
You might be asked to reboot your system to delete or rename certain system files before the Installation Wizard runs.
The Genesys Installation Wizard launches and the Welcome panel is displayed.
- On the Welcome panel, do one of the following:
- The Select Installed Application panel enables you to select the Workspace application instance to which you want to add Workspace SIP Endpoint as a plug-in.
The Genesys Installation Wizard searches the target computer for an installed version of Workspace. Select the version of Workspace in the location in which you want Workspace SIP Endpoint to be installed.
The Application Properties pane displays the name, version, and location of the selected Workspace application (see the Figure - Select Installed Application Panel of the Genesys Installation Wizard).
- After you have selected the version of Workspace that you want to use with Workspace SIP Endpoint, do one of the following:
- On the Ready to Install panel do one of the following:
- Click Install to install Workspace SIP Endpoint on your web server, development workstation, or agent workstation.
- Click Back to return to the Select Installed Application panel.
- Click Cancel to exit the Genesys Installation Wizard.
If you clicked Next, Workspace SIP Endpoint is installed in the location that you specified. When installation is complete, the Installation Complete panel is displayed.
- Click Finish to exit the Genesys Installation Wizard.
A folder that is named InteractionWorkspaceSIPEndpoint is created in the Workspace folder. The InteractionWorkspaceSIPEndpoint folder contains the Workspace SIP Endpoint application and associated files.
After the Workspace SIP Endpoint application is installed on the agent or developer workstation, or after it is downloaded by the ClickOnce application (see Deploying The ClickOnce Application On Your Web Server), and after the agent is granted permission to use the application, agents must login Workspace on a Place that is associated with a SIP DN to start the Workspace SIP Endpoint. The Workspace SIP Endpoint process is started automatically when Workspace application is being initialized.
- To ensure that the supporting programs were installed correctly, check if the following programs are available in the "uninstall programs" view of the Control Panel on your Windows workstation:
- Genesys Workspace SIP Endpoint <version>
- Microsoft Visual C++ 2005 Redistributable (8.5.113.xx and lower)
- Microsoft Visual C++ 2012 Redistributable (x86) - 11.0.60.610
[+] (optional) Procedure: Installing plugins for Workspace
Workspace enables you to install optional plug-ins for Workspace. Plug-ins, such as eServices Social Media interaction handling, are available as separate IPs that you install from a separate CD/DVD.
If you deploy a plug-in as part of a ClickOnce deployment, the behavior of the ClickOnce download depends on the privileges that are assigned to the agent who is logging in. If the agent is granted the privilege to execute a plug-in, the plug-in is downloaded as part of the deployment.
The Procedure: Installing plug-ins for Workspace is a general procedure that describes how to install plug-ins for Workspace. The documentation for your plug-in provides specific information about how to install and deploy your plug-in.
Consult the documentation that comes with your plug-in for specific information about how to install and provision your plug-in.
Before you install your plug-in, you must provision it in Genesys Administrator Extension (refer to the Genesys Administrator Extension documentation for more information) in the same way that you provision Workspace.
Workspace plug-ins come with <Plug-In Name>.apd and <Plug-In Name>.xml (privileges) files, both of type Workspace. Upload the <Plug-In Name>.apd file and attach the <Plug-In Name>.xml file to create the <Plug-In Name> Template.
The Workspace application object is created based on the Workspace Template.
When you provision the Privileges that are assigned to a Role, the list of Privileges that are available for the Workspace application type combine the privileges that are specified in the Workspace.xml and <Plug-In Name>.xml files.
Important
Ensure that you do not use the template and metadata files "Workspace (Agent desktop).apd" and "Workspace (Agent desktop).xml" when working with plug-ins.
Procedure
Installing plug-ins for Interaction Workspace
Purpose:
To install plug-ins for Workspace on your web server, an agent workstation, or a development workstation.
Prerequisites
- .NET Framework 4.5
- Installation of the Workspace application by using one of the following procedures:
Start
- On your desktop, open the disc that contains the plug-in IP or the plug-in IP and double-click the Setup.exe file.
You might be asked to reboot your system to delete or rename certain system files before the Installation Wizard runs.
The Genesys Installation Wizard launches and the Welcome panel is displayed.
- On the Welcome panel, do one of the following:
- Click Next to begin the installation procedure.
- Click Cancel to exit the Genesys Installation Wizard.
- Click About to open the plug-in ReadMe in your default browser.
If you clicked Next, the Select Installed Application panel is displayed (see the Figure - Select Installed Application Panel of the Genesys Installation Wizard).
Select Installed Application Panel of the Genesys Installation Wizard
- The Select Installed Application panel enables you to select the Workspace application instance to which you want to add the plug-in.
The Genesys Installation Wizard searches the target computer for an installed version of Workspace. Select the version of Workspace in the location in which you want plug-in to be installed.
The Application Properties pane displays the name, version, and location of the selected Workspace application (see the Figure - Select Installed Application Panel of the Genesys Installation Wizard).
- After you have selected the version of Workspace that you want to use with the plug-in, do one of the following:
- Click Next to proceed to the next panel.
- Click Cancel to exit the Genesys Installation Wizard.
- Click Back to return to the previous panel.
If you clicked Next, the Ready to Install panel is displayed.
- On the Ready to Install panel do one of the following:
- Click Install to install the plug-in on your web server, development workstation, or agent workstation.
- Click Back to return to the Select Installed Application panel.
- Click Cancel to exit the Genesys Installation Wizard.
If you clicked Next, plug-in is installed in the location that you specified. When installation is complete, the Installation Complete panel is displayed.
- Click Finish to exit the Genesys Installation Wizard.
Plug-in files are copied into the target installation directory of the original Workspace deployment.
After the plug-in application is installed on the agent or developer workstation, or after it is downloaded by the ClickOnce application (see Deploying The ClickOnce Application On Your Web Server), and after the agent is granted permission to use the application, agents must login Workspace on a Place that is associated with a SIP DN to use the plug-in with Workspace. The plug-in process is started automatically when Workspace application is being initialized.
End
Tip
If you did not add Language Packs in the previous step, you can perform a manual installation at this point by using the
manual procedure.
3. Deploy the ClickOnce application on your web server
Use the Workspace Deployment Manager wizard or console to generate the file hierarchy that is required by the ClickOnce application on your web server.
During the deployment of the ClickOnce application, you are required to enter the following information in the Deployment Manager wizard (this information also has to be added to the silent.xml file to be used by the console):
- The deployment URL
- The deployment version
- The deployment certificate:
- If you do have a deployment certificate, select the Sign with a provided certificate option, and then browse to select the certificate. You must also input the password in the dedicated text box.
- If you do not have a deployment certificate, do not select the Sign with a provided certificate option. Without a signed package, a security warning is displayed whenever the client downloads the package.
Be sure to have this information ready before you begin.
The first two procedures: Wizard: Deploy the Workspace downloadable ClickOnce package on your web server or Console: Deploy the Workspace downloadable ClickOnce package on your web server contain the deployment steps for deploying Workspace on your web server. Choose which procedure you want to use.
Tip
You can put the Workspace downloadable package in a shared directory instead of on your web server, and then install Workspace from a shared directory.
Choose one of the following two ways to deploy the ClickOnce application on your Web Server:
[+] 3a. Wizard: Deploy the Workspace downloadable ClickOnce package on your web server
[Modified: 8.5.102.06]
Purpose: Deploy the Workspace downloadable package on your web server by using the Workspace Deployment Manager Wizard
Important
The following procedure employs a Windows-based Deployment Wizard. If your HTTP server is running on a Solaris or Linux server, you must first build the deployment package on a computer that is running the Windows Operating System, and then copy the package to a compatible location on your Solaris or Linux HTTP server.
Prerequisites
- Install the Deployment Manager and associated files from the Genesys Workspace disc or download image. See the Procedure: Installing Workspace Deployment Package on the Windows operating system.
- Create an Application object of type Workspace from the Workspace Application template.
- Microsoft .NET Framework 4.5 installed on the computer on which you run the wizard. This can be the computer on which you run your web server.
Start
- Open the InteractionWorkspaceDeploymentManager folder. This folder contains the application files required for deployment, including: InteractionWorkspaceDeploymentManager.exe.
- Launch the InteractionWorkspaceDeploymentManager.exe application by double-clicking the file or selecting it from the Start menu. The Deployment Manager installs the ClickOnce files on your web server. The Welcome pane of the Deployment Manager is displayed (refer to Figure - The Workspace Deployment Manager splash page).

The Workspace Deployment Manager splash page
- Click Next to proceed with the installation. Click Cancel to cancel the deployment.
- If you clicked Next, the Deployment Folder pane is displayed (refer to Figure -
Workspace Deployment Manager Deployment Folder pane). Specify the location on your server in which you want the ClickOnce files to be deployed. If you are deploying to a Solaris server or a Linux server, specify a local folder on the Windows-based computer on which you are running the Deployment Wizard. From this location, you will build the deployment package that you must manually copy to your Solaris or Linux HTTP server.

Workspace Deployment Manager Deployment Folder pane
- Click Next to proceed with the installation. Click Cancel to cancel the deployment. Click Back to return to the previous panel.
- If you clicked Next, the Package Information pane is displayed (refer to Figure -
Workspace Deployment Manager Package Information pane). This pane is filled-in automatically. Modify these parameters only if necessary.
You can change the application name, the publisher (which is displayed in the publish.htm page), and the base URL, which is the URL that corresponds with the virtual directory that is linked to the deployment folder.
There are one or more optional check boxes that you can use to add plug-ins to the Workspace application:
- Add custom files: Select to add custom content such as simple data files, including rebranding icons or sound files, or file assemblies that implement your Interaction Workspace Customization API.
- <plug-in name>: Select this option to use your installed plug-in, such as Workspace SIP Endpoint, Social Engagement plug-in, Localization Packs, and so on.
Click Next to proceed with the installation. Click Cancel to cancel the deployment. Click Back to return to the previous panel.

Workspace Deployment Manager Package Information pane
- If you clicked Next, and if you selected Add Custom Files in the previous view, the Custom Files panel is displayed (refer to Figure - Interaction Workspace Deployment Manager Custom Files pane). This window enables you to add custom content to the out-of-the-box Interaction Workspace.

Interaction Workspace Deployment Manager Custom Files pane
- Relative Path: The path where the file will be copied relative to the core Workspace installation directory.
- Data File: Not used — This should be left unchecked.
- Optional: Must be checked if the file is part of an optional module that is loaded according to user privileges. A module is considered as optional if the value of the startupLoaded attribute is set to false in the .module.config file, and the same module is associated to a task in the same file.
Important
The .module-config file that core Workspace uses for module declaration, as well as any language dictionary file required by the module, must be specified as NOT optional so that they are loaded unconditionally at Workspace start-up.
- Group Name: For mandatory files (files that have Optional unchecked), always specify Core. For optional files, specify the group name that is assigned to the module description in the .module-config file by the clickOnceGroupsToDownload attribute. For example:
<task name="InteractionWorkspace.Custom.ThePrivilege"
clickOnceGroupsToDownload="TheGroup"
modulesToLoad="TheModule" />
The following table provides examples of settings for a typical optional module comprising a DLL, a dictionary file, and a .module-config file:
| File Name |
Relative Path |
Data File |
Optional |
Group Name
|
| .module-config file |
<empty> |
unchecked |
unchecked |
Core
|
| .dll file |
<empty> |
unchecked |
checked |
<custom group>
|
| language file (.language-code.country-code.xml) |
languages |
unchecked |
unchecked |
Core
|
- Click Next to proceed with the installation. Click Cancel to cancel the deployment. Click Back to return to the previous panel.
- If you clicked Next, the Client Configuration pane is displayed (refer to Figure - Workspace Deployment Manager Client Configuration pane). In this pane, provide the following information:
- The address and port number of your local Genesys Configuration Server
- The name of the Interaction Workspace (client) application that you created in the Configuration Layer by using Genesys Administrator Extension
- (optional) To use Kerberos Single Sign-on (SSO), specify the Service Principal Name (SPN)
Enabling Client-side Port Definition: To define the client-side port functionality, check Use Client-side Port by specifying the port number and/or the IP address. Checking this option enables the following two text fields:
[Modified: 8.5.101.14]
- Port Number: The port number that a client will use to make a TCP/IP connection to Configuration Server. If the value is empty, this parameter is not used.
- IP Address: The IP address or the host name that a client will use to make a TCP/IP connection to Configuration Server. If the value is empty, this parameter is not used.
If you specify one or both values, they will be set in the InteractionWorkspace.exe.config file.
There are two additional options in this dialog box:
- Allow the end-user to change connection parameters on the login prompt: Enables agents to change their connection parameters when they log in.
- Force the end-user to upgrade to the latest available version: Disables the ability for agents to reject application updates that are pushed to agents.

Workspace Deployment Manager Client Configuration pane
- Click Next to proceed with the installation. Click Cancel to cancel the deployment. Click Back to return to the previous panel.
- If you clicked Next, the Signing pane is displayed (refer to Figure - Workspace Deployment Manager Signing pane). For more information about how to create or obtain a signing certificate, refer to the "ClickOnce Deployment and Authenticode" page on the Microsoft Developer Network web site:
http://msdn.microsoft.com/en-us/library/ms172240.aspx

Workspace Deployment Manager Signing pane
- Choose the type of signing certificate that you are using:
- Click Do not Sign. If you do not provide a certificate, a security warning is displayed whenever the client downloads the package.
- Click Sign with a provided certificate to enable the Selects a certificate field.
- Click the browse button to navigate to the certificate.
- Enter the password for the certificate in the Password field.
- Click Next to proceed with the installation. Click Cancel to cancel the deployment. Click Back to return to the previous panel.
- If you clicked Next, the Ready to Build pane is displayed (refer to Figure - Workspace Deployment Manager Ready to Build pane). This pane contains a summary of the files that will be deployed on your web server and a confirmation of the deployment URL.

Interaction Workspace Deployment Manager Ready to Build pane
- Click Next to complete the deployment. Click Cancel to cancel the deployment. Click Back to modify any of the previous panes.
- If you clicked Next, the Deployment Manager deploys the Workspace ClickOnce application in the path that you specified at the beginning of the wizard execution. This can be the appropriate place on your web server.
When the deployment is complete, the Deployment Finished pane is displayed (refer to Figure - Workspace Deployment Manager Deployment Finished pane). This pane contains messages that relate to the success of the deployment.

Interaction Workspace Deployment Manager Deployment Finished pane
- Click Finish to close the Workspace Deployment Manager.
Deployment proceeds. When deployment is complete, the publish.htm web page is opened in your default browser automatically (refer to Figure - Workspace pubish.htm web page viewed through Microsoft Internet Explorer).

Interaction Workspace pubish.htm web page viewed through Microsoft Internet Explorer
The publish.htm web page confirms that the Workspace package is published and provides you with the version number.
If you have not installed the prerequisites, the page contains a link to the prerequisite installers.
- If you are deploying on a Solaris or Linux HTTP server, copy the collection of files that was created by the Deployment Wizard on your Windows-based computer to your HTTP server.
End
Next Steps
- If you have not installed the prerequisites, in the publish.htm web page, click Install to launch setup.exe to install the prerequisite installers.
- If you already have installed the prerequisites, the application bootstrap either installs a new version automatically, upgrades your existing version, if necessary, or starts the application, if it is installed and up to date.
[+] 3b. Console: Deploy the Workspace downloadable ClickOnce package on your web server
Purpose: Deploy the Workspace downloadable package on your web server by using the Workspace Deployment Manager Console (silent deployment).
Important
The console mode enables administrators and solution designers to create a script-based ClickOnce deployment to automate deployment.
Prerequisites
- Install the Deployment Manager and associated files from the Genesys Workspace disc or download image. See the Procedure: Installing Workspace Deployment Package on the Windows operating system.
- Create an Application object of type Workspace from the Workspace Application template.
- Microsoft .NET Framework 4.5 installed on the computer on which you run the wizard. This can be the computer on which you run your web server.
Start
- Open the WorkspaceDeploymentManager folder. This folder contains the application files required for deployment.
- Edit the silent.xml file (refer to an example below) to include the deployment parameters that you require, including any custom files (custom plugins) you want to install. The Table - The deployment attributes that are contained in silent.xml file describes the parameters that you can specify.
- Launch the InteractionWorkspaceDeploymentManager.exe application by using a command line like the following:
start /wait interactionworkspacedeploymentmanager.exe -s silent.xml
The following Command Line Arguments are supported:
- -s <silent_file_name>: (mandatory for console execution) This attribute specifies that the deployment manager will execute in console mode, and specifies the configuration file used for execution.
- -f <log_file>: (optional) This attribute specifies the path and the name of the log file printed during the deployment manager execution.
Use the command start /wait if you want the script to wait for end of process execution.
- If you are deploying on a Solaris or Linux HTTP server, copy the collection of files that was created by the Deployment Wizard on your Windows-based computer to your HTTP server.
End
Next Steps
- If you have not installed the prerequisites, in the publish.htm web page, click Install to launch setup.exe to install the prerequisite installers.
- If you already have installed the prerequisites, the application bootstrap either installs a new version automatically, upgrades your existing version, if necessary, or starts the application, if it is installed and up to date.
The deployment attributes that are contained in silent.xml file
XML Key Name: ApplicationToDeploy
Description: The application that Workspace Desktop Edition Deployment Manager will deploy.
If the value is empty or WorkspaceDesktopEdition, deployment of Workspace Desktop Edition with or without plug-ins (Workspace SIP Endpoint can be a plug-in in this mode)
If the value is WorkspaceSIPEndpoint, deployment of Workspace SIP Endpoint in standalone mode
Default Value:
Example: WorkspaceSIPEndpoint
XML Key Name: DeploymentDestinationFolder
Description: The path where the Deployment Manager console will copy the built ClickOnce package.
This path can be the Production Web Site path or an interim storage from where another utility will have to push the package to the Production Web Site.
Default Value:
Example: c:\temp\depmgr
XML Key Name: EndUserConfigureClientSidePort
Description: When set to true, the Deployment Manager Console populates the client-side port/address in the property file that is deployed with Workspace on the destination workstation.
Default Value: false
Example:
XML Key Name: EndUserClientSideTransportAddress
Description: The Client-Side Address that the deployed Workspace application will use to connect to Configuration Server.
Default Value:
Example: 123.123.123.200
XML Key Name: EndUserClientSideTransportPort
Description: The Client-Side Port that the deployed Workspace application will use to connect to Configuration Server.
Default Value:
Example: 12345
XML Key Name: EndUserConfigAllowUserToChangeConnectionParameters
Description: When set to true, the Configuration Server Host, Port, and Application Name can be edited in the login window of the deployed Workspace application (if the user clicks More).
When set to false, the application will always use the parameters that are configured in this file.
Default Value: false
Example:
XML Key Name: EndUserConfigApplicationName
Description: The Application Name that the deployed Workspace application will use to connect to Configuration Server.
Default Value:
Example: InteractionWorkspace850
XML Key Name: EndUserConfigHost
Description: The Host Name that the deployed Workspace application will use to connect to Configuration Server.
Default Value:
Example: <your host name>
XML Key Name: EndUserConfigPort
Description: The Port that the deployed Workspace application will use to connect to Configuration Server.
Default Value:
Example: 2021
XML Key Name: InformationApplicationName
Description: Name of the ClickOnce package.
The name of the .application file to be downloaded on the target workstation.
The icon on the target workstation desktop will have this name.
Default Value: Workspace
Example:
XML Key Name: InformationPublisher
Description: The name of the company that delivers the ClickOnce package.
Default Value:
Example: Genesys Telecommunications Laboratories, Inc
XML Key Name: InformationURL
Description: The URL Root from which the final ClickOnce package will be downloaded by end users.
Default Value:
Example: http://<your host name>/InteractionWorkspace
XML Key Name: OptionsAllowsMultiDeployment
Description: When set to true, the ClickOnce package is built to allow distinct ClickOnce packages instances to be installed on the same target destination.
Default Value: false
Example:
XML Key Name: OptionsAllowUpgradeFrom812VersionsEndEarlier
Description: When set to false, the ClickOnce package includes a 32-bit version of the Workspace executable. This is the default mode when using a regular IP, and this is the recommended mode to optimize the memory footprint on an agent workstation.
The value true is required only if you deployed the ClickOnce packages with 8.1.2 versions or earlier and want to ensure a smooth upgrade without first uninstalling old versions. This deploys a 64-bit enabled .NET executable, which can run on a 32-bit OS, and which consumes a significantly higher memory footprint than a 32-bit-only executable when running on a 64 bits OS.
Default Value: false
Example:
XML Key Name: PackagesToDeploy
Description: The list of optional file packages ("plug-ins") to be included in the ClickOnce package.
Default Value:
Example: Sip Endpoint;Language Pack for French (France)
XML Key Name: SigningCertificateFileName
Description: The path to the certificate to be used to sign the package.
Default Value:
Example: c:\inetpub\InteractionWorkspace
XML Key Name: SigningPassword
Description: The password that is required to sign the ClickOnce package with the selected certificate.
Default Value:
Example: abcd
XML Key Name: SigningSignsWithProvidedCertificate
Description: When set to true, the Deployment Manager Console attempts to sign the ClickOnce package with the provided signing data.
Default Value: false
Example:
[Added: 8.5.102.06]
XML Key Name: EndUserConfigServicePrincipalName
Description: Specifies the Service Principal Name to support Kerberos Single Sign On.
Default Value: ""
Example:
[Added: 8.5.101.14]
XML Key Name: EndUserConfigForceUpgrade
Description: Specify whether agents can reject ClickOnce upgrades when they are presented at login time. When set to true, agents are forced to upgrade to this new version of the application at next application start. When set to false, agents are prompted with the choice to upgrade immediately or later.
Default Value:false
Example:
The following is an example of a silent.xml file (refer to procedure 1b):
<?xml version="1.0" encoding="windows-1250"?>

<configuration>

 <InformationApplicationName>Interaction Workspace</InformationApplicationName>

 <InformationURL>http://BLSHGS1/InteractionWorkspace</InformationURL>

 <InformationPublisher>Genesys Telecommunications Laboratories</InformationPublisher>

 <DeploymentDestinationFolder>c:\temp\depmgr</DeploymentDestinationFolder>

 <SigningSignsWithProvidedCertificate>false</SigningSignsWithProvidedCertificate>

 <SigningCertificateFileName></SigningCertificateFileName>

 <SigningPassword></SigningPassword>

 <EndUserConfigHost>bsgenbruno811</EndUserConfigHost>

 <EndUserConfigPort>2021</EndUserConfigPort>

 <EndUserConfigApplicationName>InteractionWorkspace850</EndUserConfigApplicationName>

 <EndUserConfigureClientSidePort>true</EndUserConfigureClientSidePort>

 <EndUserClientSideTransportAddress>123.123.123.200</EndUserClientSideTransportAddress>

 <EndUserClientSideTransportPort>12345</EndUserClientSideTransportPort>

 <EndUserConfigAllowUserToChangeConnectionParameters>false</EndUserConfigAllowUserToChangeConnectionParameters>

 <EndUserConfigAllowFrameworkInstall>false</EndUserConfigAllowFrameworkInstall>

 <EndUserConfigServicePrincipalName>confserv/host:port</EndUserConfigServicePrincipalName>

 <PackagesToDeploy>Sip Endpoint;Language Pack for French (France)</PackagesToDeploy>

 <OptionsAllowsMultiDeployment>false</OptionsAllowsMultiDeployment>

 <OptionsAllowUpgradeFrom812VersionsEndEarlier>false</OptionsAllowUpgradeFrom812VersionsEndEarlier>

 <EndUserConfigForceUpgrade>false</EndUserConfigForceUpgrade>

</configuration>
Adding Custom Files to a console deployment
If you want to add custom files to your Workspace console deployment, such as a custom Workspace plugin, you can edit the silent.xml to specify the reference to the plugin deployment file, which describes the list of custom files of the plugin. The deployment file name can be anything, but it must have the file extension .deployment-config'.
In step 2 of the 3b. Console: Deploy the Workspace downloadable ClickOnce package on your web server procedure, edit the PackagesToDeploy XML Key Name to specify the DeploymentName specified in the .deployment-config file that represents your plugin.
Create the .deployment-config file of your plugin using code which is similar to the following:
<?xml version="1.0" encoding="utf-8" ?>
<configuration>
  <configSections>

    <sectionGroup name="applicationSettings" type="System.Configuration.ApplicationSettingsGroup, System, Version=2.0.0.0, Culture=neutral, PublicKeyToken=b77a5c561934e089" >
      <section name="DeploymentManager.ApplicationSettings" type="System.Configuration.ClientSettingsSection, System, Version=2.0.0.0, Culture=neutral, PublicKeyToken=b77a5c561934e089" requirePermission="false" />
    </sectionGroup>
  </configSections>

  <applicationSettings>
    <DeploymentManager.ApplicationSettings>

      <setting name="DeploymentName" serializeAs="String">
        <value>theNameOfThePackageThatShowsUpAsPluginInInteractiveModeOrToBePopulatedInPackageToDeployInConsoleMode</value>
      </setting>

      <setting name="MandatoryFiles" serializeAs="Xml">
        <value>
          <ArrayOfApplicationFile xmlns:xsi="http://www.w3.org/2001/XMLSchema-instance" xmlns:xsd="http://www.w3.org/2001/XMLSchema">
            <ApplicationFile FileName="PluginFile1" RelativePath="emptyForInstallRootOrSubdirectoryName" DataFile="false" EntryPoint="false" IsMainConfigFile="false" Optional="falseForConditionalByPrivilege" GroupName="clickOnceGroupsToDownload" />
            <ApplicationFile FileName="PluginFile2AndSoOn" RelativePath="emptyForInstallRootOrSubdirectoryName" DataFile="false" EntryPoint="false" IsMainConfigFile="false" Optional="true" GroupName="clickOnceGroupsToDownload" />
          </ArrayOfApplicationFile>
        </value>
      </setting>

    </DeploymentManager.ApplicationSettings>
  </applicationSettings>
</configuration>
Change the following placeholders in the code to reflect your specific requirements:
- DeploymentName: The name of the module/plugin as reported in deployment manager (Wizard interface or in silent.xml file)
- ApplicationFile: Must be repeated for each file composing the plugin
- FileName: Name of the file
- RelativePath: Relative path of the file inside the plugin. Empty if located with the other core WDE files.
- Optional: Set to true if the plugin should be downloaded only if a specific privilege is required.
- GroupName: A group name that matches with the one defined in the .module-config file of the custom plugin
4. Enable the ClickOnce Package on your web server
Choose one of the following procedures depending on the web server in your environment:
[+] 4a. (For Apache deployments) Configuring Apache to enable the ClickOnce package
Purpose:
By default, the Apache web server does not permit the download of documents of specific MIME types. Apache must be configured to enable the ClickOnce package.
Prerequisites
- Apache Server 2.x on any Operating System it supports.
Start
- In the conf/mime.types file (in the Apache install folder), add the following lines:
application/x-ms-application application
application/x-ms-application manifest
application/octet-stream deploy
- Save the file.
End
[+] 4b. (For IIS Deployments) Configuring Microsoft IIS6 to enable the ClickOnce package
Purpose: Microsoft IIS must be configured to enable the ClickOnce package.
Prerequisites
- Microsoft IIS on any Operating System it supports
Start
- From Administrative Tools, start Internet Information Services Manager.
- Right click the tree leaf that represents your server.
- Select Properties from the contextual menu.
- In the Properties dialog box, click Mime Types.
- Click New to add each of the following configuration pairs:
.application => application/x-ms-application
.manifest => application/x-ms-application
.deploy => application/octet-stream
- Click OK.
- Click OK to validate the new MIME types list.
End
5. Verify your configuration
Verify that Workspace was correctly deployed on your web server and client workstation.
[+] Procedure: Configuration verification (Testing the client)
Purpose:
To ensure that the Workspace application was correctly deployed on your web server and client workstation.
Start
- On a client workstation, open a new Internet browser window.
- In the Address field, enter the URL of the Workspace web application:
http://<host>/<application name>/publish.htm
For example:
http://SUITE80/Workspace/publish.htm
- Press Enter on your keyboard. The Workspace ClickOnce publish window opens (see the Figure - Workspace publish window).
This window lists all of the prerequisites that should be installed before you launch Workspace for the first time.
- If all prerequisites are installed, click launch to launch the Workspace installer application.
- If a security-warning dialog box appears, click Install.
When installation is complete, a shortcut is placed on the desktop, after which the application launches. The Workspace agent-login window is displayed.
- Enter the following information into the agent-login panel and the connection-parameters panel:
- User Name: A valid user name that is configured in the Configuration Layer
- Password: The valid password for the specified user name
- Click Login to continue logging in to Workspace; click Cancel to close the agent-login window without logging in.
Refer to Workspace User's Guide for more information about how to log in to Workspace and use the application.
End
Next Steps
Installation is complete. You can provision Interaction Workspace functionality:
Rollback to a previous release of Workspace
[+] Rollback to a previous release of Workspace by using ClickOnce
Purpose:
Rollback the software version installed on the end user (agent) workstation to the previously deployed release of your Workspace package after you have deployed a new version of your Workspace package by using ClickOnce. Here, 'Workspace package' defines the combination of the core Workspace product and the associated customization files.
Pre-requisites:
- Identify the out-of-the-box Workspace version that will host the downgrade package (refer to Restriction below).
- Identify the list of custom files (.dll, .module-config, .properties, .xml and so on) that comprise the downgrade package.
Restriction:
When you activate the Force upgrade option of the Deployment Manager, any package version that is downloaded to an end user (agent) workstation requires that the new package version has a version greater than the currently installed one. This means that the procedure above does not allow you to rollback installation on workstations to a version of the out-of-the-box Workspace product that is lower than the currently installed version (as the core Workspace version is used to build the ClickOnce package version). It only allows you to rollback to a previous version of the custom files associated to same of more recent version of out-of-the-box Workspace. To downgrade to an older version of out-of-the-box Workspace, when the Force upgrade option has been enabled, an explicit uninstall of the former package on the workstation is required before downloading the older version.
Start
- Navigate to the location where the target out-of-the-box version comprising the downgrade package is available.
- Execute the Workspace Deployment Manager (console or UI) of the Workspace version that must be part of this rollback.
- Specify in the wizard execution or in the console configuration file, the list of custom files that must compose the rollback package.
- Run the Deployment Manager to increment the package build number.
- After the rollback package is created, push it to the web server.
- Restart the agent application or, from the Main Menu select Check and Update. The agent is prompted to update to the new version.
End
Deploying the Developer Toolkit on your development workstation
Use the Procedure: Installing Workspace Customization on the Windows operating system to install the Workspace application and Developer's Kit on your development workstation. This procedure installs everything that is required to build and test a Workspace extension. For information about how to build a custom extension or customize Workspace, see the Workspace 8.5 .NET Developer's Guide & API Reference.
Procedure
Installing Workspace Customization on the Windows operating system
Purpose: To install the deployment files for Workspace Customization on your development workstation.
Prerequisites
Start
- On your desktop, open the Workspace disc or the Workspace IP and double-click the Setup.exe file.
You might be asked to reboot your system to delete or rename certain system files before the Installation Wizard runs.
The Genesys Installation Wizard launches and the Welcome panel is displayed.
- On the Welcome panel, do one of the following:
- Click Next to begin the installation procedure.
- Click Cancel to exit the Genesys Installation Wizard.
- Click About to open the Workspace ReadMe file in your default browser.
If you clicked Next, the Select Options panel is displayed.
- On the Select Options panel, do one of the following:
- Choose Install Interaction Workspace Developer Toolkit, and click Next.
- Click Back to return to the Welcome panel.
- Click Cancel to exit the Genesys Installation Wizard.
For more information on installation options, see the Table - Workspace Install Mode Deployment Packages.
If you clicked Next, the Choose Destination Location panel is displayed (see the Figure - Choose Destination Location panel of the Genesys Installation Wizard).
Choose Destination Location panel of the Genesys Installation Wizard
- (Optional) If you are installing from the International DVD, the Language Pack Selection panel is displayed.
Language Pack Selection panel of the Genesys Installation Wizard
Select Select Language Pack to display the list of available language packs.
Adding and Removing languages by using the Language Pack Selection panel of the Genesys Installation Wizard
To select a language for installation, select it in the left hand box then click Add. The language is moved to the right hand box. To de-select a language for installation, select it and click Remove. The language is moved back to the left hand box and will not be installed. After you have added to the right hand box the languages that you want to install, do one of the following:
- Click Next to continue the installation procedure.
- Click Back to return to the Select Options panel.
- Click Cancel to exit the Genesys Installation Wizard.
- On the Choose Destination Location panel, specify the location on your development workstation in which the Workspace customization files are to be installed by doing one of the following:
- Type a location in the Destination Folder text box.
- Click Default to reset the location to the default location.
- Click Browse to navigate to a destination folder.
- With the destination folder specified, do one of the following:
- Click Next.
- Click Back to return to the Select Options panel.
- Click Cancel to exit the Genesys Installation Wizard.
If you clicked Next, the Ready to Install panel is displayed.
- On the Ready to Install panel do one of the following:
- Click Install to install the Interaction Workspace customization files.
- Click Back to return to the Choose Destination Location panel.
- Click Cancel to exit the Genesys Installation Wizard.
If you clicked Install, the Workspace customization files are installed in the location that you specified (see the Figure - Contents of the Workspace install disc or image copied onto the web-server host).
Contents of the Workspace install disc or image copied onto the web-server host
The Workspace folder contains the following:
- The Bin folder, which contains the Workspace API
- The Doc directory, which contains the Workspace 8.5 .NET Developer's Guide & API Reference (WorkspaceSDKNet.chm)
- The Workspace folder, which contains Workspace application files
- The WorkspaceDeploymentManager folder, which contains the application files that are required to deploy customized code, including the Deployment Manager application (InteractionWorkspaceDeploymentManager.exe), and the following subfolder:
- WebPublication"Contains the publish.htm file.
- The Samples directory, which contains code samples that demonstrate Genesys best-practices recommendations for developers
- When installation is complete, the Installation Complete panel is displayed.
- Click Finish to exit the Genesys Installation Wizard.
End
Next Steps
Non-ClickOnce deployment
Installing the Workspace application
Install the out-of-the-box Workspace application on an end-user desktop. The installation contains only the agent application. Use this procedure if you are not going to use the ClickOnce centralized deployment.
Procedure
Installing the Workspace application on a client desktop
Purpose: To install the Workspace client application on your local agent workstation or virtual machine to test the Workspace application.
Prerequisites
Start
- On your desktop, open the Workspace disc or the Workspace IP and double-click the Setup.exe file.
You might be asked to reboot your system to delete or rename certain system files before the Installation Wizard runs.
The Genesys Installation Wizard launches, and the Welcome panel is displayed.
- On the Welcome panel, do one of the following:
- Click Next to begin the installation procedure.
- Click Cancel to exit the Genesys Installation Wizard.
- Click About to open the Workspace ReadMe in your default browser.
If you clicked Next, the Select Options panel is displayed.
- On the Select Options panel, do one of the following:
- Choose Install Workspace application, and click Next.
- Click Back to return to the Welcome panel.
- Click Cancel to exit the Genesys Installation Wizard.
If you clicked Next, the Choose Destination Location panel is displayed (see the Figure - Choose Destination Location panel of the Genesys Installation Wizard).
Choose Destination Location panel of the Genesys Installation Wizard
- (Optional) If you are installing from the International DVD, the Language Pack Selection panel is displayed.
Language Pack Selection panel of the Genesys Installation Wizard
Select Select Language Pack to display the list of available language packs.
Adding and Removing languages by using the Language Pack Selection panel of the Genesys Installation Wizard
To select a language for installation, select it in the left hand box then click Add. The language is moved to the right hand box. To de-select a language for installation, select it and click Remove. The language is moved back to the left hand box and will not be installed. After you have added to the right hand box the languages that you want to install, do one of the following:
- Click Next to continue the installation procedure.
- Click Back to return to the Select Options panel.
- Click Cancel to exit the Genesys Installation Wizard.
- On the Choose Destination Location panel, specify the location on your agent workstation in which Workspace is to be installed by doing one of the following:
- Enter a location in the Destination Folder text box.
- Click Default to reset the location to the default location.
- Click Browse to navigate to a destination folder.
- With the destination folder specified, do one of the following:
- Click Next.
- Click Back to return to the Select Options panel.
- Click Cancel to exit the Genesys Installation Wizard.
If you clicked Next, the Ready to Install panel is displayed.
- On the Ready to Install panel, do one of the following:
- Click Install to install Workspace on the client desktop.
- Click Back to return to the Choose Destination Location panel.
- Click Cancel to exit the Genesys Installation Wizard.
If you clicked Next, the Workspace client application is installed in the location that you specified. When installation is complete, the Installation Complete panel is displayed.
The Workspace agent application is installed by the Install Workspace application option into the folder that you specified (for more information about installation options, see the Table - Workspace Install Mode Deployment Packages).
- Click Finish to exit the Genesys Installation Wizard.
- (optional) Procedure: Installing the Workspace SIP Endpoint.
-
(optional) To use Kerberos Single Sign-on (SSO), edit the login.kerberos.service-principal-name option in the interactionworkspace.exe.config property file to add the following line:
<appSettings>
 ...
 <add key="login.kerberos.service-principal-name" value="<SPN Name"/>
 <add key="login.url" value="tcp://<host><port>/AppName" />
 <add key="login.connections.parameters.isenable" value="false" />
 ...
</appSettings>
-
(optional) To include custom packages, add the customization resources that are required for your final installation.
-
If you executed at least one of the steps 9 to 11:
-
Prepare your final package by using the updated file set.
-
Push your custom package to the agent workstations.
- To launch the Workspace client application on the client desktop, select it from the Start menu or navigate to the installation folder that you specified and double-click the InteractionWorkspace.exe file .
The Workspace login window is displayed on the client desktop (see the Figure - Workspace agent Login window with no connection parameters). The connection panel of the login window indicates that no connection has been specified. Before the agent can log in, you must connect to the Workspace application in your Genesys Framework.

Workspace agent Login window with no connection parameters
- Click the More Options drop-down list to open the connection options panel (see the Figure - Workspace agent Login window with the connection-parameters panel displayed).

Workspace agent Login window with the connection-parameters panel displayed
- Enter the following information into the agent-login panel and the connection-parameters panel:
- User Name: A valid user name that is configured in the Configuration Layer
- Password: The valid password for the specified user name
- Application Name: The name that is specified for the Workspace application object to which you want to connect
- Host Name: The name of the web server.
- Port: The port that is configured for your web-server application
See the Figure - Workspace agent Login window with the connection-parameters panel displayed for an example of how to populate the fields in the Workspace login window.
- Click Login to continue logging in to Workspace; click Cancel to close the agent-login window without logging in.
Refer to Workspace User's Guide for more information about how to log in to Workspace and use the application.
End
Next Steps
Installing Workspace Desktop Edition in Silent mode for Windows
To install Workspace Desktop Edition in Silent mode:
- Update the genesys_silent.ini file by making the following modifications:
- Agree with license agreement by setting required option: LicenseAgreement=Accepted.
- Add the path to the Workspace Desktop Edition directory. For example, InstallPath=C:\Program Files (x86)\GCTI\Workspace Desktop Edition..
- Choose installation mode option from one of the following supported values:
- INTEGRATOR - Prepare a ClickOnce package.
- DEVELOPER - Install Developer Toolkit.
- USER - Install application.
InstallMode = <INTEGRATOR, DEVELOPER or USER installation mode of Workspace Desktop Edition on this box>
- If you are installing/upgrading Workspace Desktop Edition, specify the version, build number before the installation:
- Specify whether Workspace Desktop Edition can dynamically modify the Genesys Softphone configuration by using the Connector=<Disable or Enable> parameter.
- Mode= <FirstInstall or Upgrade of Workspace Desktop Edition on this box>
- IPVersion= <current (before upgrade) version of Workspace Desktop Edition on this box>
- IPBuildNumber= <current (before upgrade) build number of Workspace Desktop Edition on this box>
- Execute the following command:
setup.exe /s /z"-s 'FullPathToGenesysSilentConfigurationFile' -sl 'FullPathToGenesysSilentResultFile' -t 'FullPathToGenesysSilentInstallationListingFile'"
where:
- /s specifies that the installation is running in InstallShield Silent Mode.
- /z passes the Genesys Silent mode silent parameters to the installation.
For information about silent language pack installation, see the
Adding and removing Language Packs.


